
Install Exchange Server 2019 on Windows Server 2019. A step by step Guide
In this blog we will meet all the required prerequisites those are required to be met to install Exchange Server 2019 and learn how to install Exchange Server 2019 on Windows Server 2019 step by step.
This is the 5th article of Exchange Server 2019 and Exchange Hybrid deployment. Please refer to the below links for the previous blogs.
Install Active Directory on Windows Server 2019 and promote to Domain Controller
DNS records in Active Directory
Demystifying Exchange Server: Roles, Architecture, and Functionality Explained
Exchange Server 2019 prerequisites
Table of Contents
Watch video
Join us on our YouTube channel and watch how to install Exchange Server 2019 on Windows Server 2019 step by step.
Meeting prerequisites
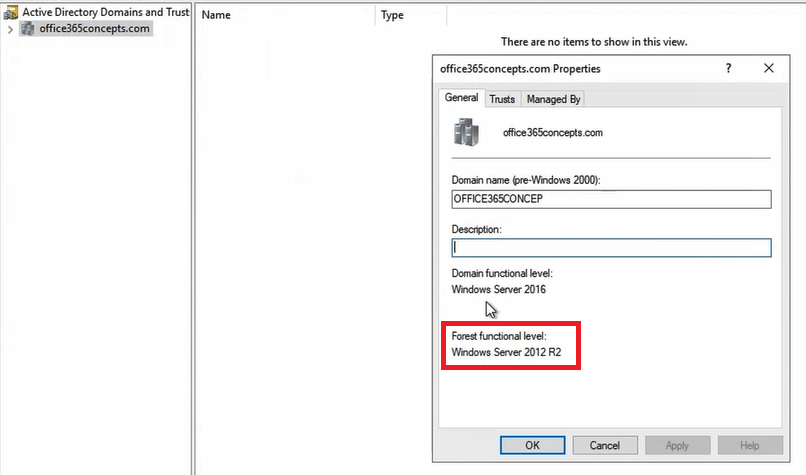
1. Verify Forest Functional Level: To verify forest functional level, go to Server Manager > Tools > Active Directory Domains and Trust.
In Active Directory Domains and Trust page, right click Active Directory domain name and click Properties. To install Exchange Server 2019 on Windows Server 2019, the Forest Functional Level should be Windows Server 2012 R2 or above.
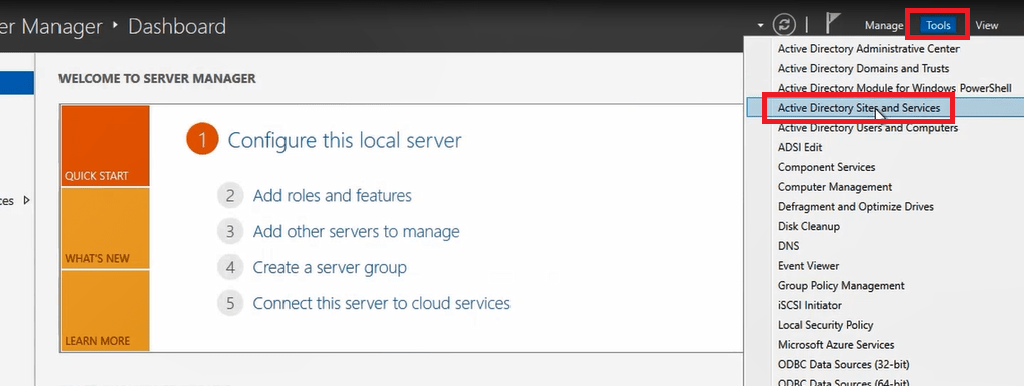
2. Verify Global Catalog server: We need to make sure that at least one Domain Controller in your forest is a Global Catalog server. Go to Server Manager > Tools > Active Directory Sites and Services.
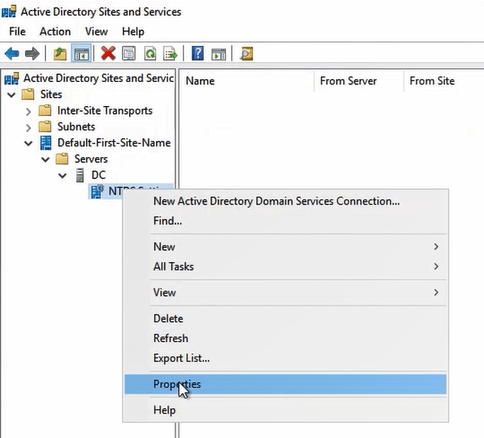
In Active Directory Sites and Services page, expand Sites > expand Default-First-Site-Name, expand DC (server name), right click NTDS Settings and click Properties.
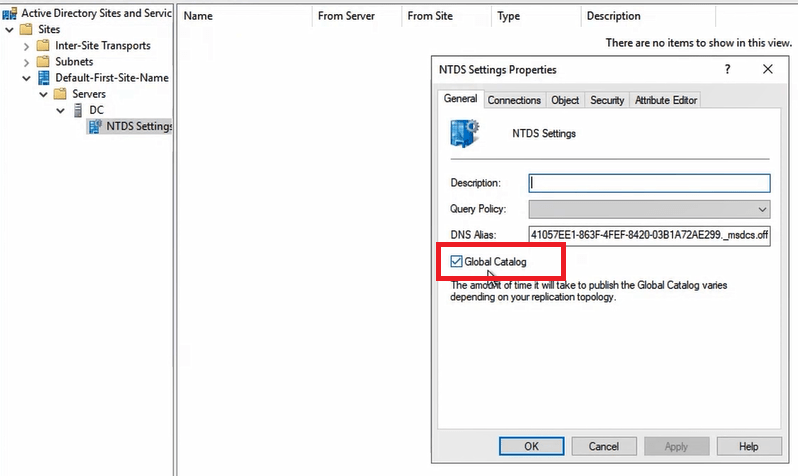
On NTDS Settings Properties page if Global Catalog is checked that means this Domain Controller is a Global Catalog server.
3. Verify Domain Controller server version: The other requirement is the Domains Controllers in your Active Directory should be running on Windows Server 2012 R2 , 2016 or 2019.
Install Exchange Server 2019 on Windows Server 2019
Now let’s move to the machine where we will install Exchange 2019.
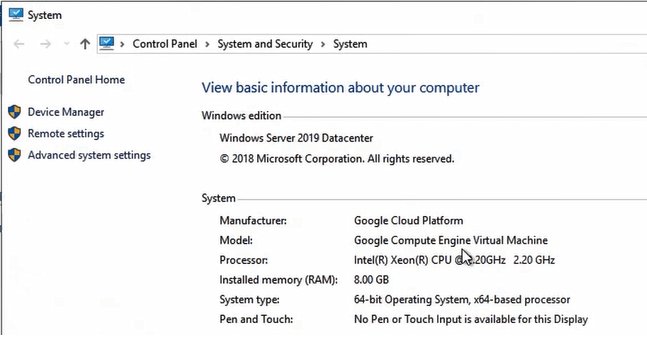
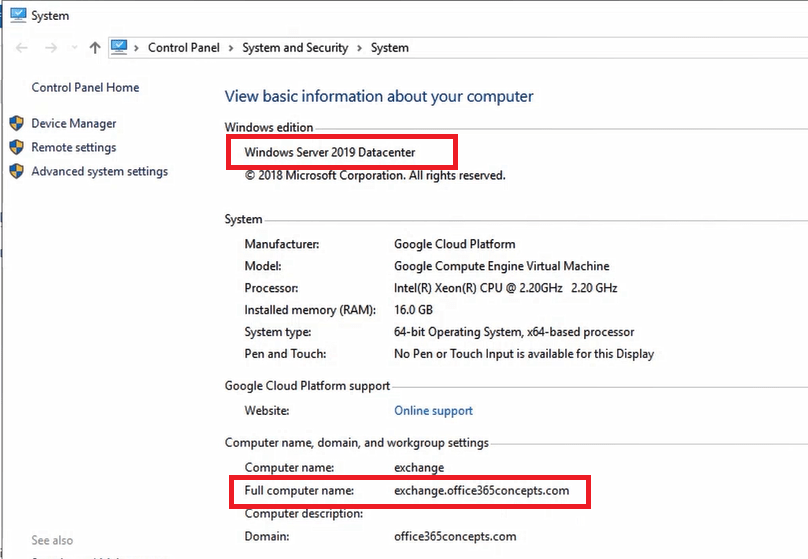
Step 1. Verify Windows Server is domain-joined: Verify the Operating System of Windows Server where you want to install Exchange 2019 and make sure this machine is joined with Active Directory domain.
In below image you can see I am installing Exchange 2019 on Windows Server 2019 Datacenter and this machine is joined with Active Directory domain.
Step 2. Verify Windows updates: We need to make sure that the Operating System has all the latest updates installed on this machine. Go to Settings > Update & Security > Check for updates.
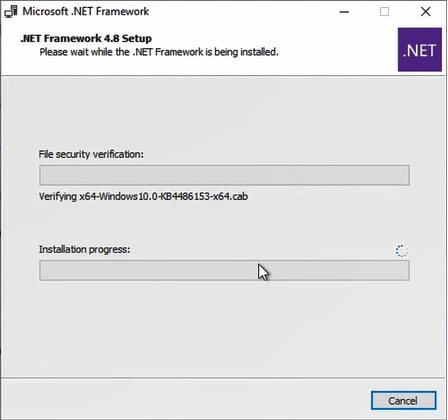
Step 3. Install .NET Framework 4.8: The next step is to install .NET Framework 4.8 on Windows Server where you will install Exchange 2019.
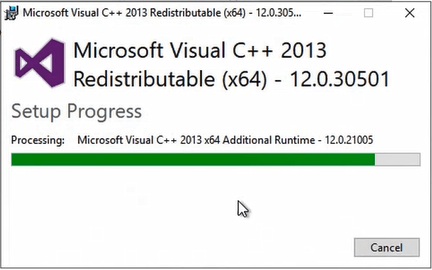
Step 4. Install Visual C++ Redistributable Package for Visual Studio 2012.
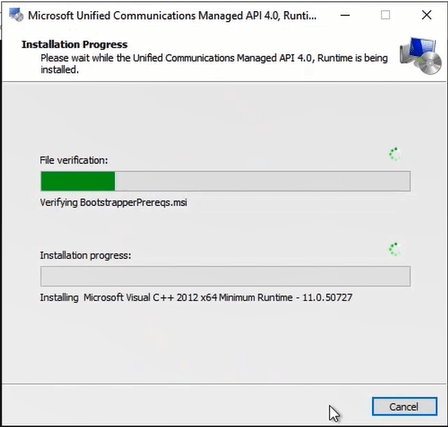
Step 5. Install Unified Communications Managed API (UCMA) 4.0.
Step 6. Restart machine.
Step 7. Next step is to install the Remote Tools Administration Pack. Open Windows PowerShell and run below command.
Install-WindowsFeature RSAT-ADDS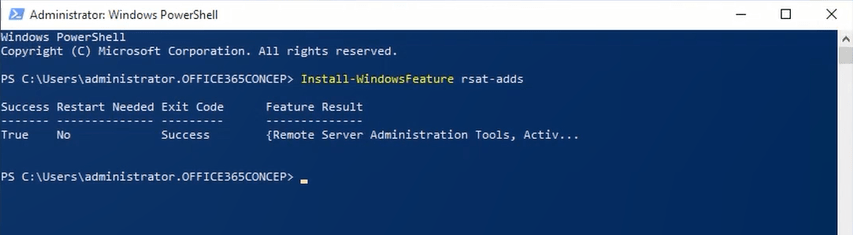
Step 8. Install Windows components those are required for Exchange installation.
Install-WindowsFeature Server-Media-Foundation, NET-Framework-45-Core, NET-Framework-45-ASPNET, NET-WCF-HTTP-Activation45, NET-WCF-Pipe-Activation45, NET-WCF-TCP-Activation45, NET-WCF-TCP-PortSharing45, RPC-over-HTTP-proxy, RSAT-Clustering, RSAT-Clustering-CmdInterface, RSAT-Clustering-Mgmt, RSAT-Clustering-PowerShell, WAS-Process-Model, Web-Asp-Net45, Web-Basic-Auth, Web-Client-Auth, Web-Digest-Auth, Web-Dir-Browsing, Web-Dyn-Compression, Web-Http-Errors, Web-Http-Logging, Web-Http-Redirect, Web-Http-Tracing, Web-ISAPI-Ext, Web-ISAPI-Filter, Web-Lgcy-Mgmt-Console, Web-Metabase, Web-Mgmt-Console, Web-Mgmt-Service, Web-Net-Ext45, Web-Request-Monitor, Web-Server, Web-Stat-Compression, Web-Static-Content, Web-Windows-Auth, Web-WMI, Windows-Identity-Foundation, RSAT-ADDS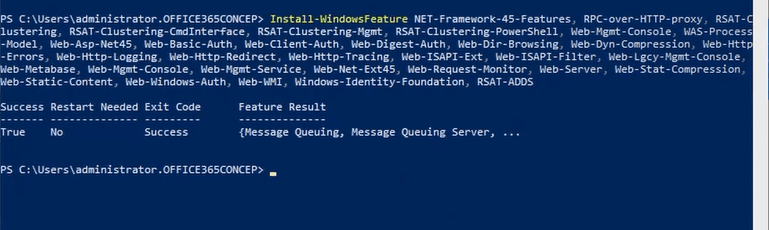
Step 9. Restart machine.
Step 10. Download Exchange Server 2019.
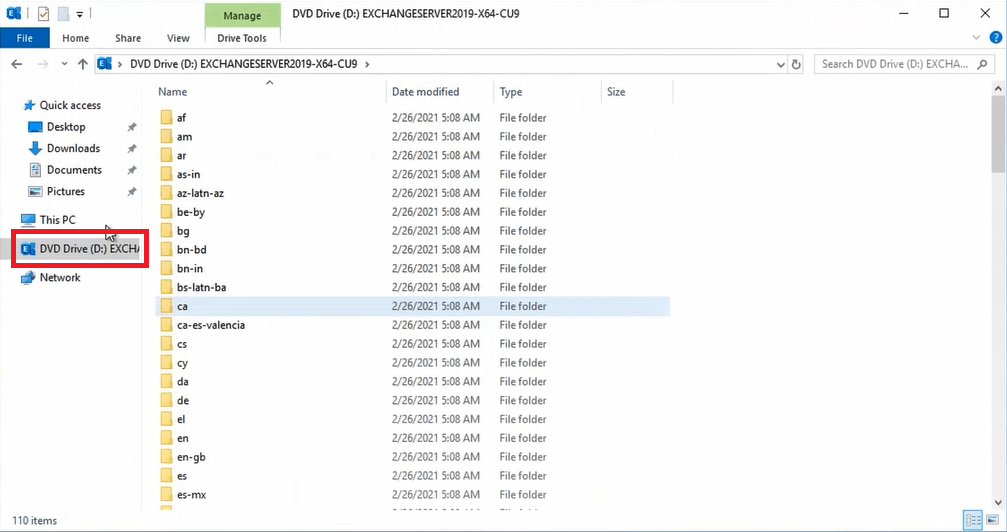
Step 11. Mount Exchange Server 2019 ISO image. To mount ISO image, right click on Exchange 2019 image and click Mount.
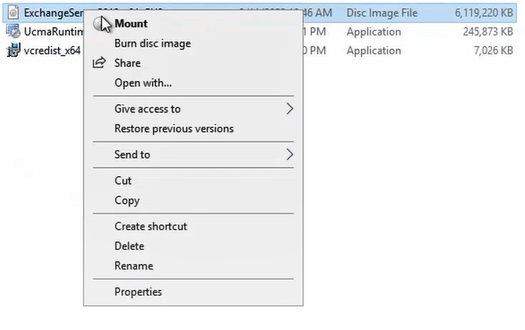
When you will mount Exchange server ISO image, it will be mounted to a new drive in your machine. In my case, this ISO image was mounted in D: drive.
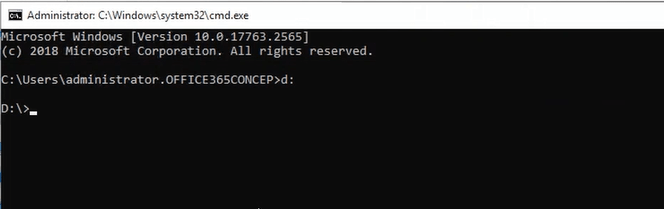
Step 12. Open Command Prompt and go to the drive location where Exchange Server 2019 ISO image is mounted. In my case it is D: drive. You can simply type D: and press Enter to change the drive location in command prompt.
Step 13. Next we will extend Active Directory schema so that Exchange attributes can be added within Active Directory objects. To extend Active Directory schema, run below command in command prompt on the same machine.
Setup.exe /PrepareSchema /IAcceptExchangeServerLicenseTerms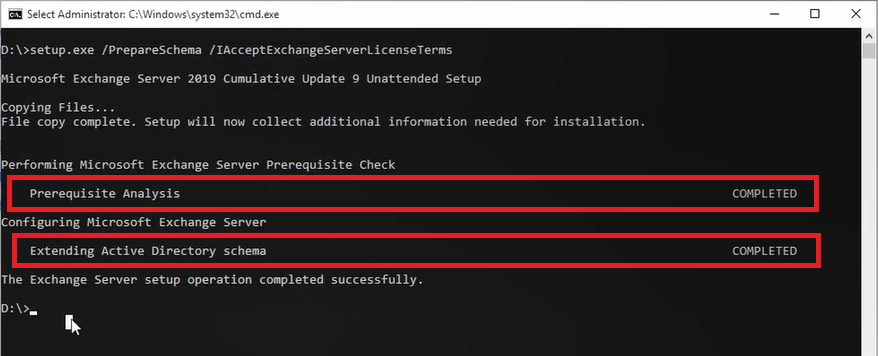
Step 14. After extending Active Directory schema we will prepare Active Directory for Exchange. During this step, Exchange will create containers, objects, and other items in Active Directory to store information. Run below command in command prompt.
Setup.exe /PrepareAD /OrganizationName:"Org Name" /IAcceptExchangeServerLicenseTerms_DiagnosticDataONStep 15. In the next step we will prepare Active Directory domains where Exchange servers will be installed. This step creates additional containers and security groups, and sets the permissions so Exchange can access them. Run below command to prepare Active Directory domains.
Setup.exe /PrepareAllDomains /IAcceptExchangeServerLicenseTerms_DiagnosticDataONStep 16. Restart machine.
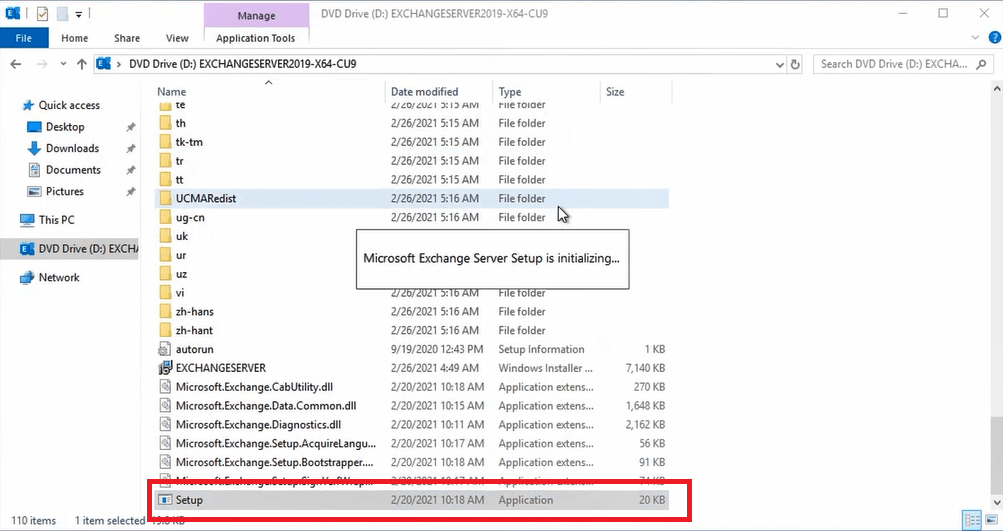
Step 17. Now go to the location where Exchange 2019 installation files are stored and double click Setup file.
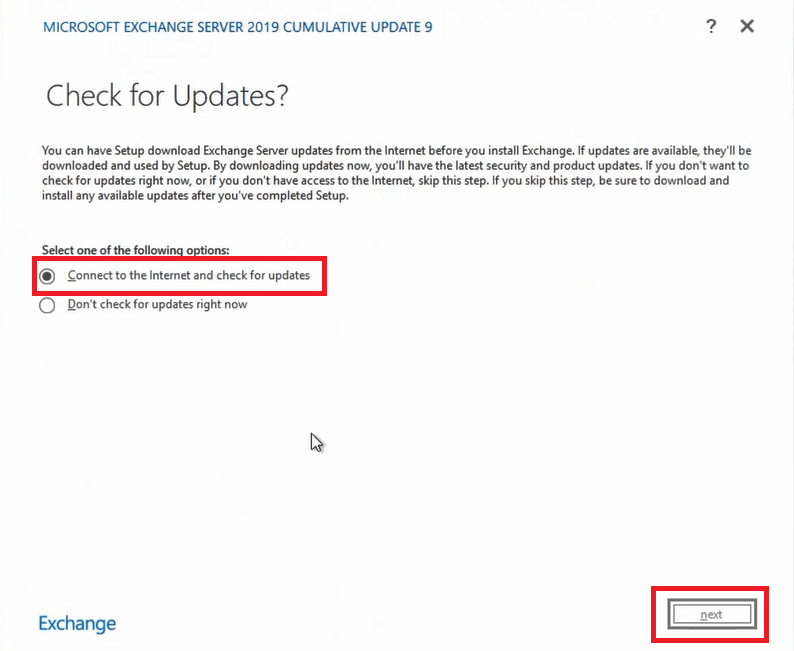
Step 18. Select Connect to the Internet and check for updates and click Next.
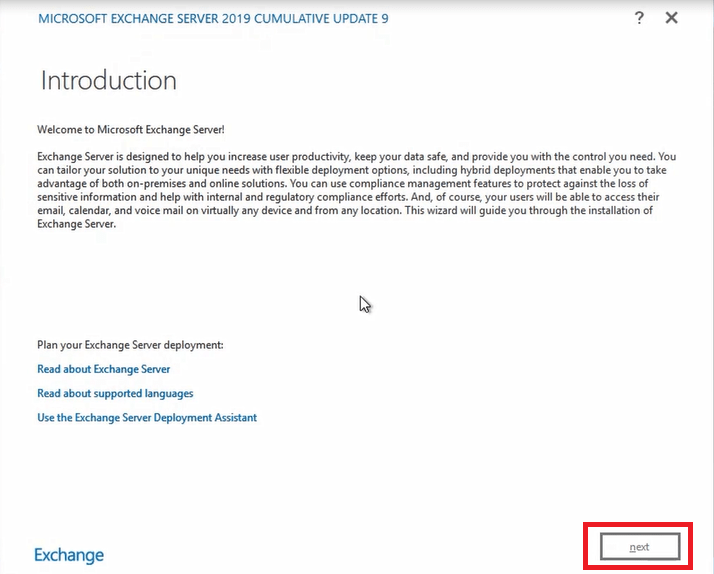
Step 19. Click Next on Introduction page.
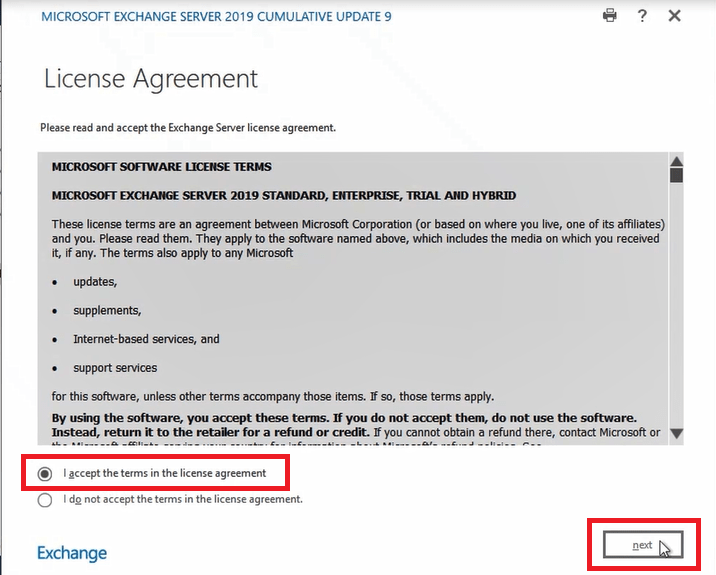
Step 20. Select I accept the terms in the license agreement and click Next.
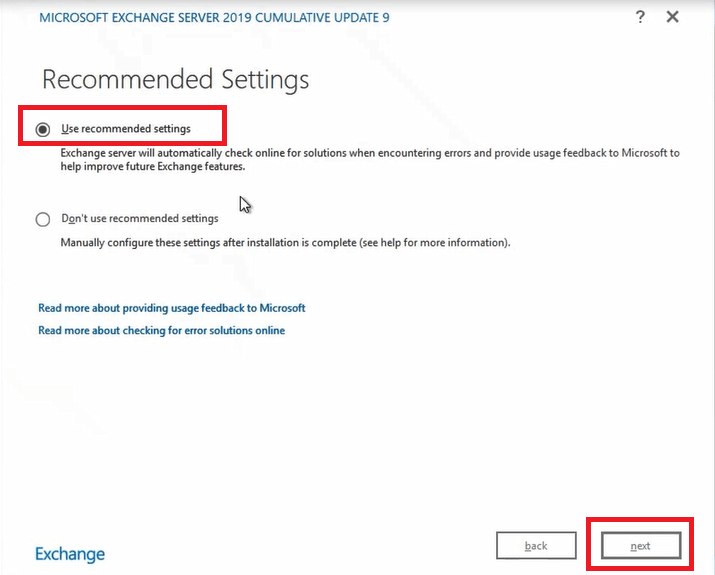
Step 21. Under Recommended Settings, select Use recommended settings and click Next.
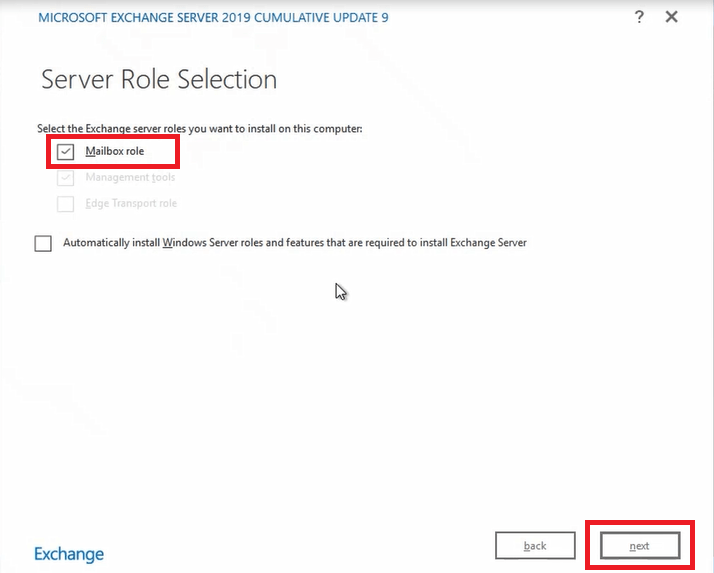
Step 22. Under Server Role Selection, check Mailbox role and click Next.
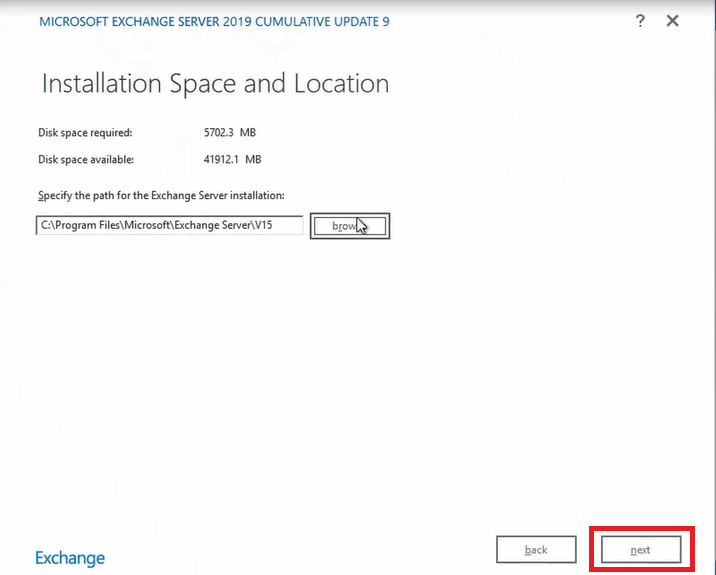
Step 23. Under Installation Space and Location, leave default location selected and click Next.
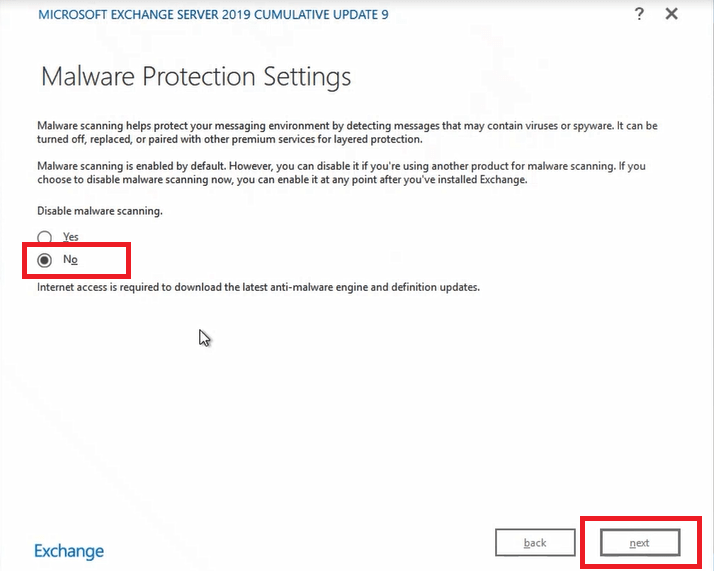
Step 24. Under Malware Protection Settings, select No and click Next.
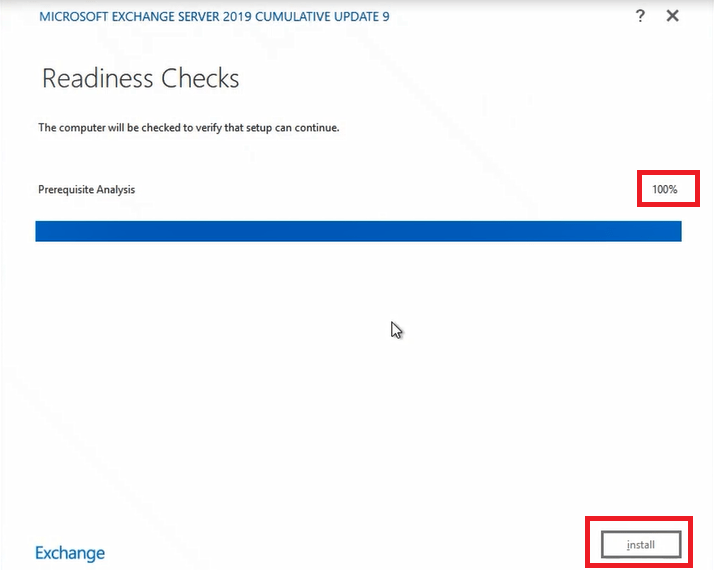
Step 25. Under Readiness Checks, Exchange server set up wizard will check if all the prerequisites are met. If this wizard throws an error, go through the error code and resolve it and run this step again. If it says 100% as shown below, click Install.
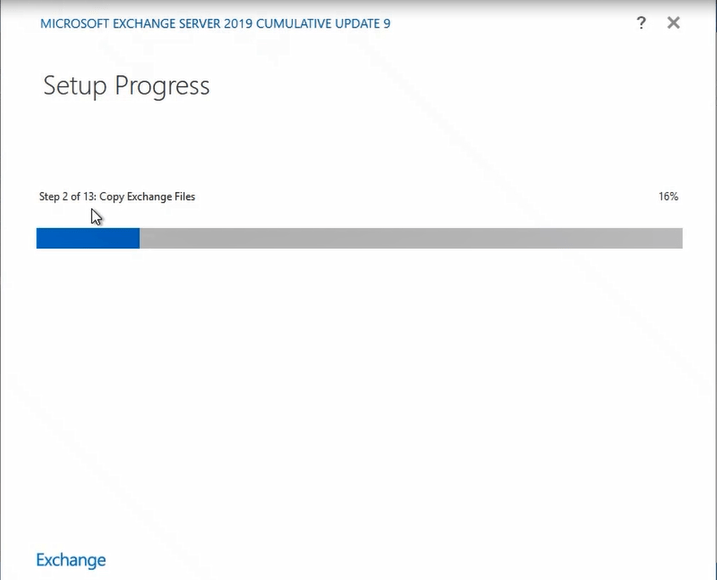
Step 26. On the next page, you will see Setup Progress where you can see the steps involved in Exchange Server 2019 installation.
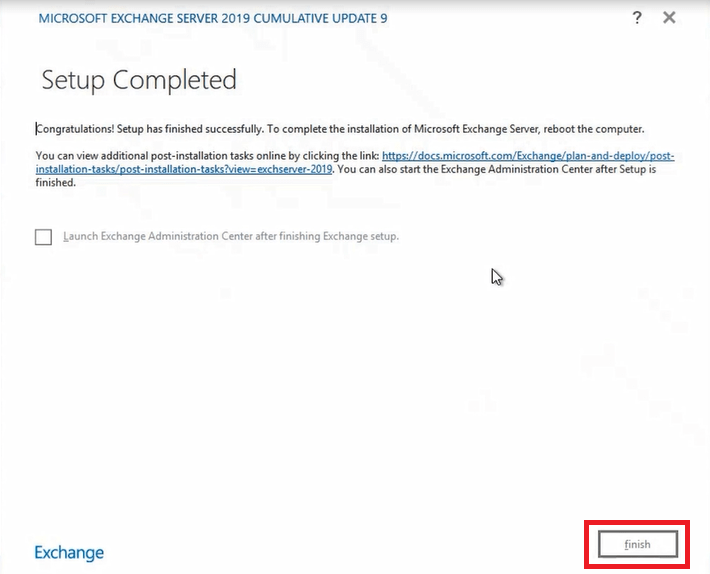
Step 27. Once Exchange 2019 is installed successfully, you will see Setup Completed page as shown below. Click Finish.
Bravo! You have successfully installed Exchange Server 2019 on Windows Server 2019.
Conclusion
In this blog we learnt how to meet Exchange Server 2019 installation prerequisites and how to install Exchange Server 2019 on Windows Server 2019 with manual installation method using set up wizard.
Found this article helpful and informative? Please share it within your community and join our Newsletter for latest blogs on Cloud Computing technology.
Related articles
We welcome you to browse our other articles.
50+ Exchange Online Mail Flow Interview questions and answers
50+ Microsoft Exchange Server Interview Questions and Answers
Top 40+ Azure Active Directory interview questions and answers
Top 50+ Office 365 Interview questions and answers
Azure AD Multi-Factor Authentication and Security Defaults
Users and Groups in Azure AD
Simple steps to add domain in Azure Active Directory
What is Azure Active Directory
Happy Learning!!