
Run Extended Message Trace using PowerShell and EAC
In this article you will learn how to run extended message trace in Office 365 using PowerShell and Exchange Admin Center (EAC). You will also learn how to export extended message trace report to CSV file, and how to read extended message trace report.
Table of Contents
Watch video
Watch this video that demonstrates step by step how to run Message Trace in Exchange Online.
What is Extended Message Trace (EMT)
An extended message trace is a detailed report that provides comprehensive information about the delivery path of an email message. It goes beyond the basic details shown in a standard message trace. A standard message trace offers basic details like sender, recipient, date, subject, and delivery status. An extended message trace dives deeper, revealing hops the email took between servers, timestamps for each stage, and potential reasons (NDR Error Codes) for delivery failures.
How to run Extended Message Trace in Exchange Admin Center
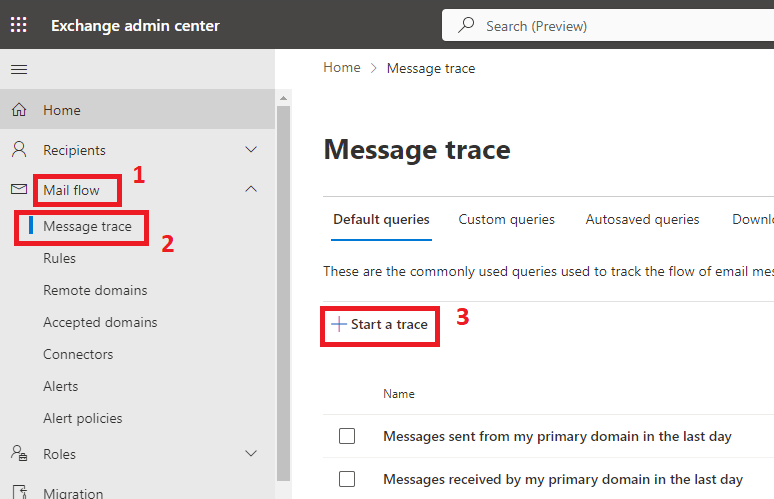
To run Extended Message Trace (EMT), go to Exchange Admin Center, expand Mail Flow, click Message trace, and click Start a trace.
On the New Message Trace page, select Time Range for more than 10 days.
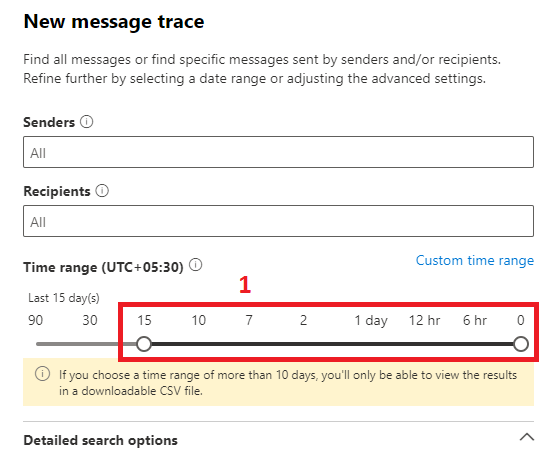
Important: To download Extended Message Trace report in CSV file, you need to select time range for more than 10 days.
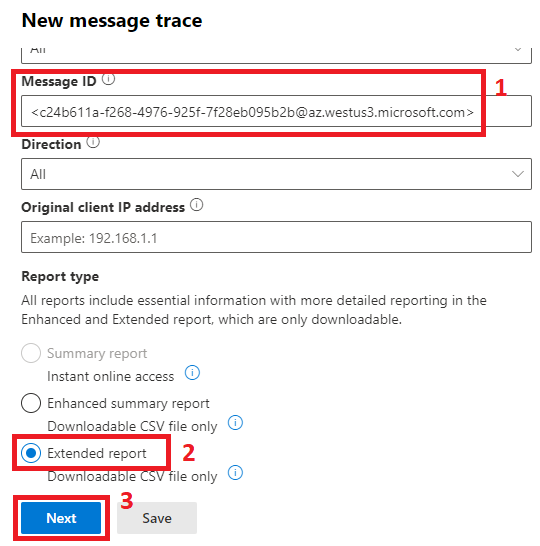
Specify the sender and recipient, or a Message ID, under Report type select Extended report, and click Next.
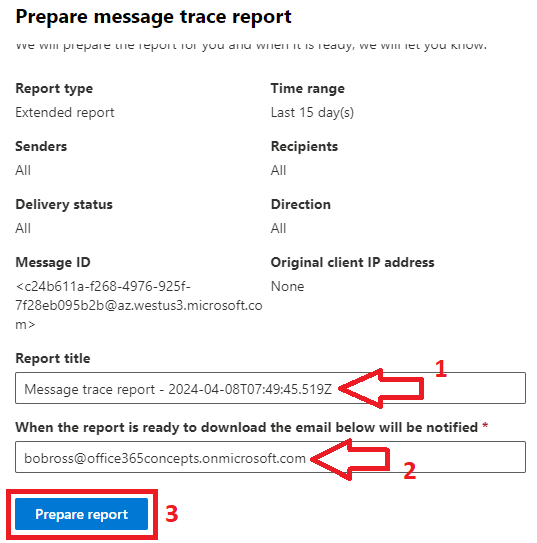
On the Prepare message trace report page, type a name for the report under Report title, add an email address to which the report will be sent once it is prepared, and click Prepare report.
Download message trace report
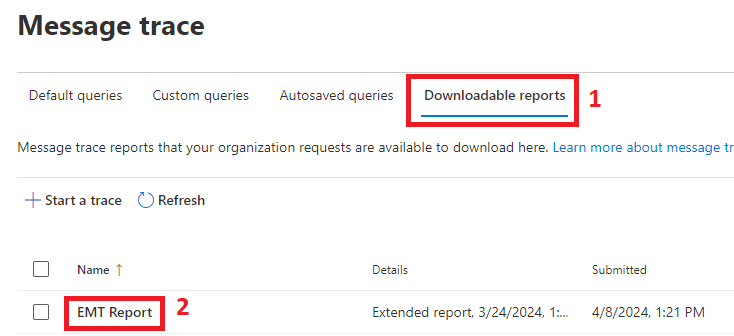
To download message trace report, on the Message trace page, click Downloadable reports, and click the report as shown below:
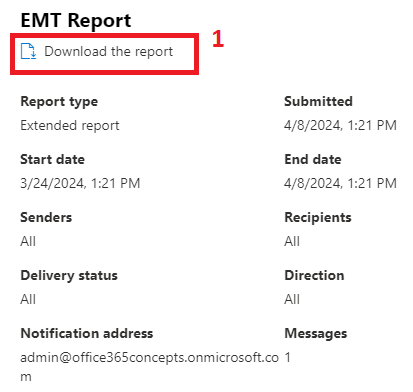
On the next page, click Download the report.
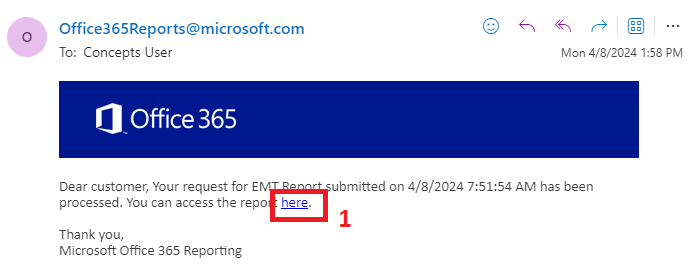
You will also receive an email on the email address provided while running Extended Message Trace report as shown below from where you can download the extended message trace report.
Extended Message Trace PowerShell commands
To run extended message trace using PowerShell, we will use Start-HistoricalSearch and Get-HistoricalSearch commands.
Run Extended Message Trace using Message ID
To run extended message trace report using Message ID, we will specify the ReportType, Message ID, StartDate, and EndDate parameters.
Important: The ReportType parameter of Start-HistoricalSearch PowerShell command has 2 parameters for message trace as MessageTrace and MessageTraceDetail. If you want to download an extended message trace report, use MessageTraceDetail, and if you want to download enhanced message trace report, use Messagetrace under ReportType.
Start-HistoricalSearch -ReportTitle "Report Name" -ReportType MessageTraceDetail -MessageID "Type message ID" -StartDate "mm/dd/yyyy" -EndDate "mm/dd/yyyy" -NotifyAddress "email address to send report"The actual command will look like below:
Start-HistoricalSearch -ReportTitle "EMT Report1" -ReportType MessageTraceDetail -MessageID "<4aee85529ac94b06bbf8c6e87ab54c67@177775138>" -StartDate "03/25/2024" -EndDate "04/08/2024" -NotifyAddress "bobross@office365concepts.onmicrosoft.com"The above command will start an extended message trace job as shown below. Initially the report status will show as Not Started.

To check extended message trace report status, run below PowerShell command:
Get-HistoricalSearchThe above command will list all the message trace reports as shown below:

You can also find the extended message trace report in Exchange Admin Center and download it once status is changed to Complete.

Run Extended Message Trace using Sender and Recipient
In this example we will run extended message trace report using sender and recipient email address.
Start-HistoricalSearch -ReportTitle "EMT Report2" -SenderAddress "john@office365concepts.com" -RecipientAddress "bob@office365concepts.com" -ReportType MessageTraceDetail -StartDate "03/25/2024" -EndDate "04/08/2024" -NotifyAddress "reports@office365concepts.onmicrosoft.com"Run Extended Message Trace for all users in a specific domain
In this example we will run a message trace by adding all users of office365concepts.com domain in Senders field.
Start-HistoricalSearch -ReportTitle "EMT Report All Users" -SenderAddress "*office365concepts.com" -ReportType MessageTraceDetail -StartDate 03/25/2024 -EndDate 04/08/2024 -NotifyAddress "reports@office365concepts.onmicrosoft.com"How to read Extended Message Trace (EMT)
To learn how to read extended message trace report, please watch this video on our YouTube channel.
Conclusion
In this article you learnt how to run extended message trace using Exchange Admin Center and PowerShell. You might like our other articles on How to analyze email header, and Exchange Online Protection (EOP) architecture.
If you found this article helpful and informative, please share it within your community and do not forget to share your feedback in the comments below. Join us on YouTube for the latest videos on the Cloud technology and join our Newsletter for the early access of the articles and updates.
Happy Learning!!