
Configure Client Access Services in Exchange 2019
In this blog we learn how to configure Client Access Services in Exchange 2019. We will configure Autodiscover service in Exchange 2019, and we will configure Exchange server 2019 for external access so that users can connect to Exchange services from external network.
Table of Contents
Watch video
Watch this video on our YouTube channel to learn how to configure Autodiscover and Outlook Anywhere on Exchange server 2019.
What is Client Access Services in Exchange server 2019
The Client Access services in Exchange server works like a front door for the client applications. It accepts all the client connection requests and routes them to the correct mailbox database.
There are multiple applications that can be used to access a mailbox. For example, Outlook desktop client, OWA (Outlook on the web), and the mobile applications. All these applications use Client Access Services in Exchange server to connect to the mailboxes.
There are other services as well those are dependent on Client Access Services. For example, Autodiscover, Free/Busy lookups, and Address Book.
So if Client Access Services are misconfigured in your Exchange server, users will not be able to access their mailboxes and all these services will not work.
Important: In prior versions of Exchange server like, Exchange 2010 or 2013, you used to install Client Access Server role on a different server. But in Exchange server 2016 and 2019, Client Access Server role has been removed and its functionality has been combined with the Mailbox Server role. And now it is called Client Access Services.
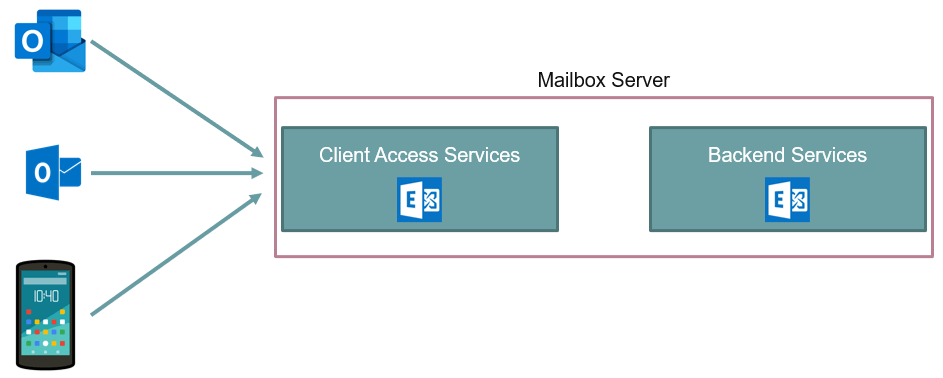
Client Access Services architecture
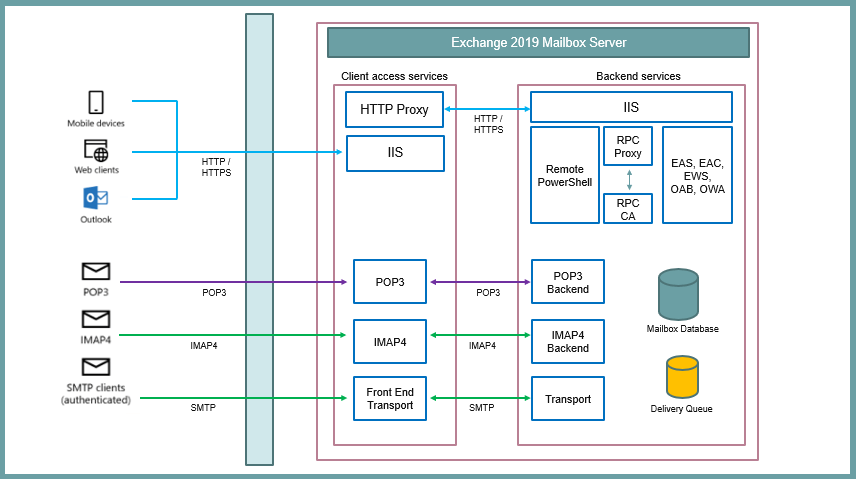
Above is a high level picture of Client Access Services architecture. Whenever users use client applications to access their mailboxes, these applications connect to the Client Access Services, and Client Access Services proxy these requests to the backend server that is running on the mailbox server.
Clients do not directly connect to the backend services. They always connect to the client access services and these requests are forwarded to the backend server by the client access services.
The protocol that is being used by a client determines the protocol that will be used by the client access services to proxy the request to the backend services running on the Mailbox server. That means if client is using HTTP protocol, then same protocol will be used by the client access services to proxy that request.
Configure Client Access Services in Exchange 2019
Configure Outlook Anywhere in Exchange 2019
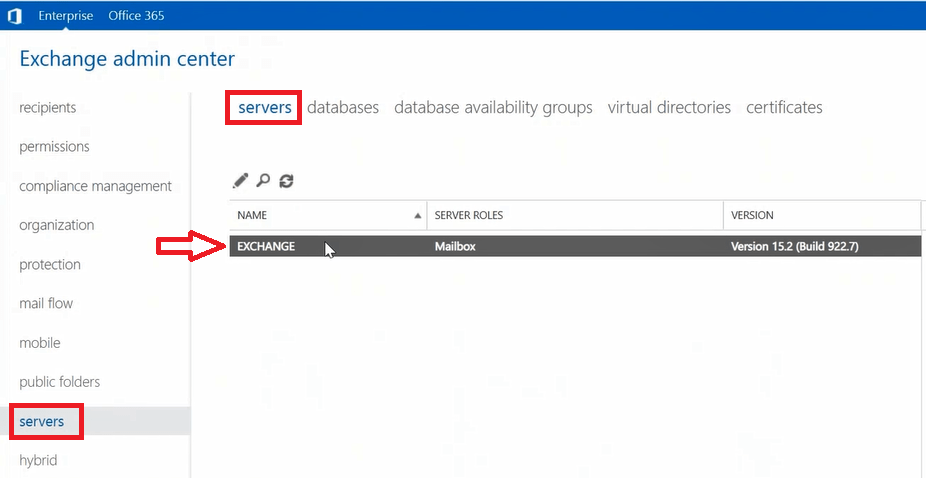
To configure outlook anywhere in Exchange server 2019, go to Exchange admin center, click Servers, click servers again, and double click Exchange server name as shown below.
On the settings page, click Outlook Anywhere, and under Specify the external host name and Specify the internal host name, type the host name of your Exchange server.
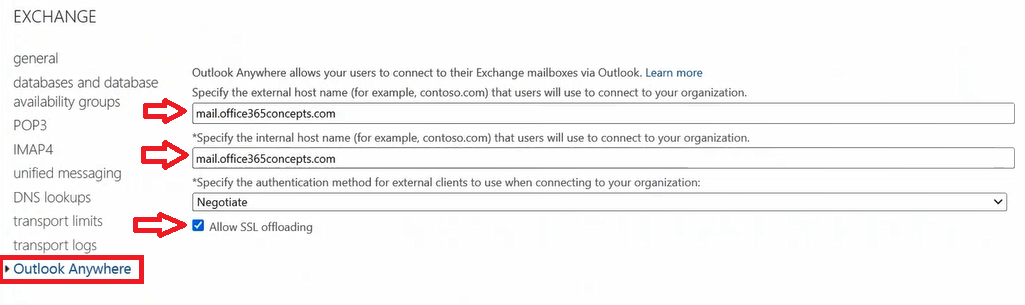
Under Specify the authentication method for external clients, select Negotiate and check Allow SSL offloading. Click Save to save the settings.
So this is how you configure Outlook Anywhere in Exchange 2019.
Configure Autodiscover in Exchange 2019
Now let’s configure Autodiscover service in Exchange Server 2019.
Configure Autodiscover internal URL
First we will configure AutoDiscoverServiceInternalUri by running below PowerShell command in Exchange Management Shell:
Set-ClientAccessService -Identity "Exchange Server Name" -AutoDiscoverServiceInternalUri "https://mail.office365concepts.com/autodiscover/autodiscover.xml"Create CNAME record in local DNS / Setup CNAME for Exchange server
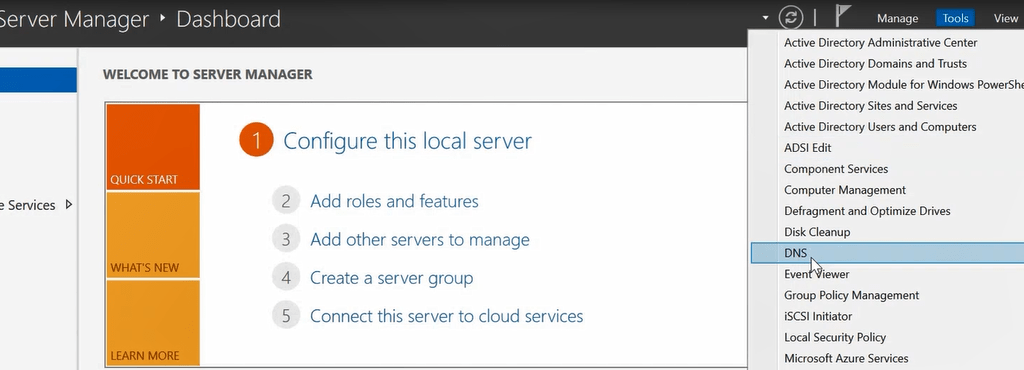
After configuring Autodiscover internal URL, we need to create a CNAME record in local DNS to resolve Autodiscover queries internally. To create a CNAME record in local DNS, go to Server Manager on the DNS server (Domain Controller in most of the cases), click Tools and click DNS.
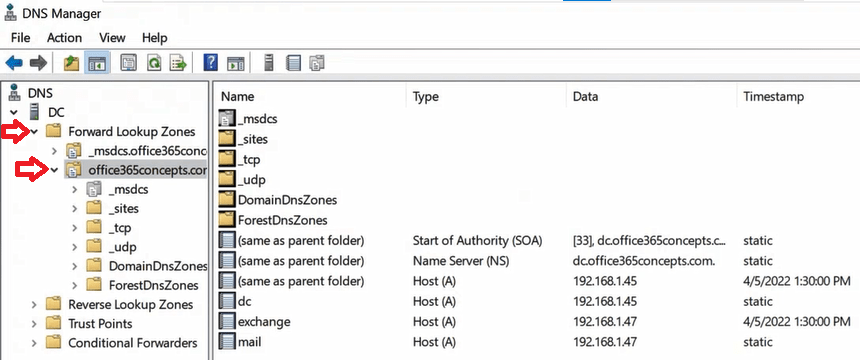
On the DNS Manager expand Forward Lookup Zones and select your Active Directory domain name.
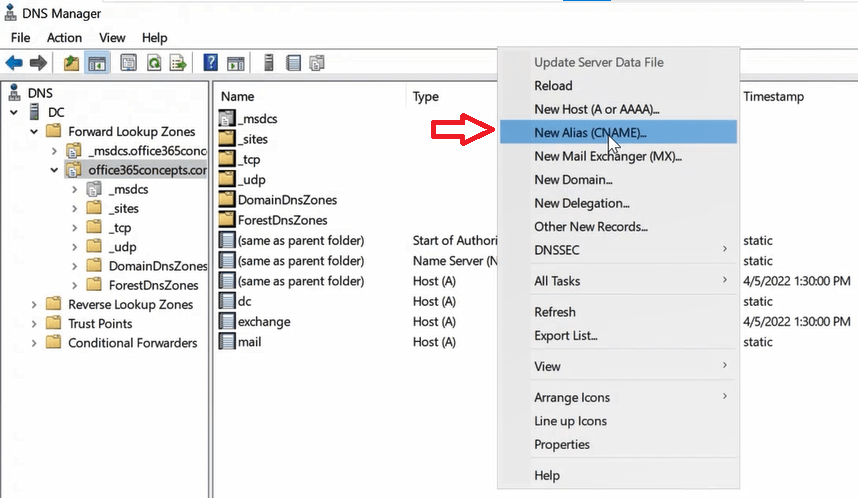
Right click in blank area where you see DNS records, and select New Alias (CNAME).
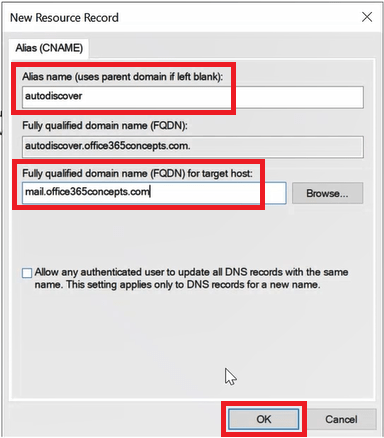
Under Alias name type autodiscover, under Fully qualified domain name type the hostname of the Exchange Server and click OK.
Create CNAME record in public DNS
In the above step we created a CNAME record in our local DNS that will resolve Autodiscover queries in internal network. But we need to create a CNAME record in public DNS as well to resolve Autodiscover queries from external network.
Go to domain provider portal (public DNS) and create a CNAME record with below details:
Type: CNAME
Name: autodiscover
Value: mail.office365concepts.com
TTL: 1 Hour
Configure Exchange server for external access
When it comes to access a mailbox either using OWA or outlook client or even a mobile phone, users can either use internal network or they can access these applications from external network. So as an administrator you need to make sure that these services are available and accessible from the external network.
You need to make sure port 80 and 443 are open on your network so that Exchange server can communicate with external applications.
Conclusion
In this blog you learnt what is Client Access Service in Exchange 2019, how to configure Outlook Anywhere in Exchange 2019, how to configure Autodiscover in Exchange 2019, and how to configure Exchange server for external access.
Found this article helpful and informative, please share it within your community. Join us on our YouTube channel for latest videos on Cloud technology and join our Newsletter for early access and the updates.
Exchange Server 2019 related articles
We welcome you to browse our other articles on Exchange Server 2019 and Exchange Hybrid deployment:
Install Active Directory on Windows Server 2019 and promote to Domain Controller
DNS records in Active Directory
Exchange Server Roles, Architecture, and Functionality Explained
Exchange Server 2019 prerequisites
Install Exchange Server 2019 on Windows Server 2019. A step by step Guide
How to configure Exchange Server 2019 post installation
Transport Pipeline in Exchange Server 2019
Configure Mail Flow in Exchange Server 2019
Create FREE Let’s Encrypt certificate and install on Exchange Server
What is Edge Transport Server
How to install Edge Transport Server in Exchange 2019 organization
Setup EOP as a smart host in Exchange Server 2019
How to configure SMTP relay in Exchange server 2019
Demystifying Autodiscover. A Deep Dive into Autodiscover
Happy Learning!!