Create FREE Let’s Encrypt certificate and install on Exchange Server
In this article we will learn how to create free let’s encrypt certificate, how to create let’s encrypt certificate for Exchange Server and automatically install it on Exchange Server.
In the previous article we configured external mail flow in Exchange Server 2019. Now its time to create FREE let’s encrypt certificate and install let’s encrypt certificate for Exchange Server 2019.
Table of Contents
Watch video
If you prefer to watch step by step instructions to create and install FREE let’s encrypt certificate for Exchange Server, please watch this video.
Why do you need SSL certificate for Exchange Server
If your users are using Exchange services internally and you do not want your Exchange services to be published to external network, you probably do not need a 3rd party certificate. You can use a self-signed certificate to manage all the tasks internally.
But if you decide to publish your Exchange services to the Internet so that users can access Exchange services like OWA or Autodiscover from external network, and if you are planning to deploy exchange hybrid, or you are planning to integrate 3rd party services with your on-premise Exchange server, in that case you need a certificate that is issued by a 3rd party Certification Authority.
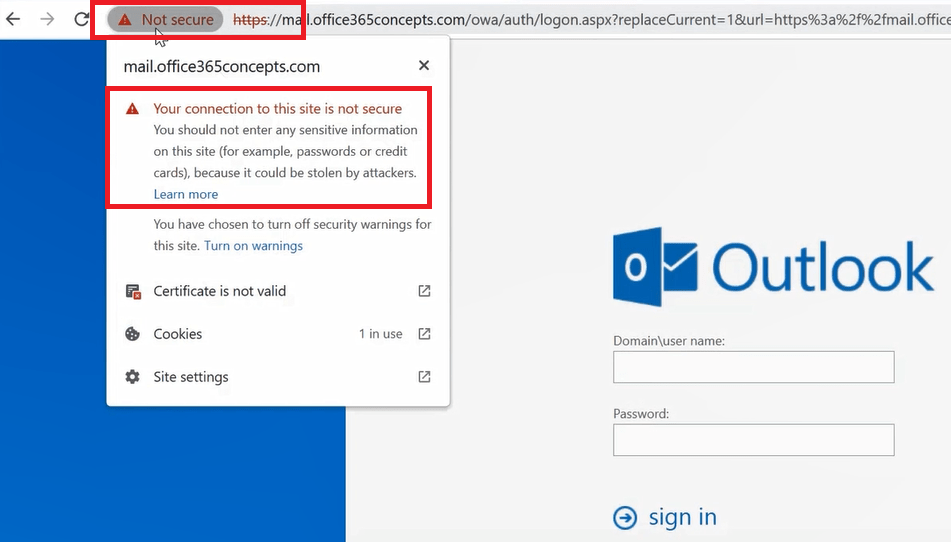
As of now I do not have a 3rd party certificate on my Exchange Server. So if I open OWA or try to access EWS URL from external network, it says connection is not secure (as shown below) because I do not have a SSL certificate for my Exchange server.
What is Let’s Encrypt Free Certificate
You can buy a certificate from any 3rd party Certification Authority. For example Digicert, Comodo, GeoTrust or Godaddy. But if you are not interested in paying for the certificate, you can even get a free SSL certificate for your Exchange server. And one of such certificate provider is Let’s Encrypt.
You can achieve everything using Let’s Encrypt SSL certificate, you can publish your Exchange services to the Internet, you can secure the communication between the users from the Internet and your Exchange server, and even you can deploy Exchange hybrid using this certificate. The only downside to free let’s encrypt certificate is, that this certificate is valid for only 90 days and after every 90 days you will have to renew this certificate.
Create Let’s Encrypt certificate for Exchange Server
You can install Lets Encrypt certificate using PowerShell script, or using Windows ACME tool. Download win-acme.v2.1.20.1185.x64.pluggable.zip file from official website. At the time of writing this blog, the latest application version is win-acme.v2.2.6.1571.x64.pluggable.zip. Please check official website for latest releases.
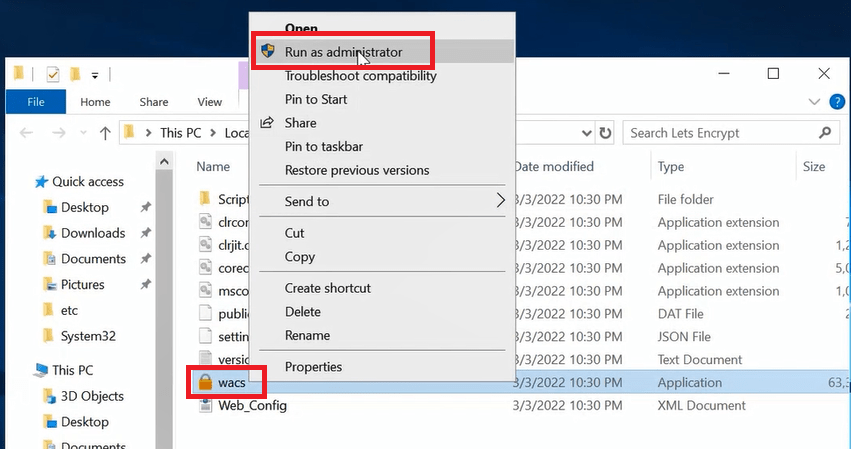
Download win-acme.v2.1.20.1185.x64.pluggable.zip file and extract it in a folder. Right click wacs application and click Run as administrator.
Steps to install FREE Let’s Encrypt certificate in Exchange Server
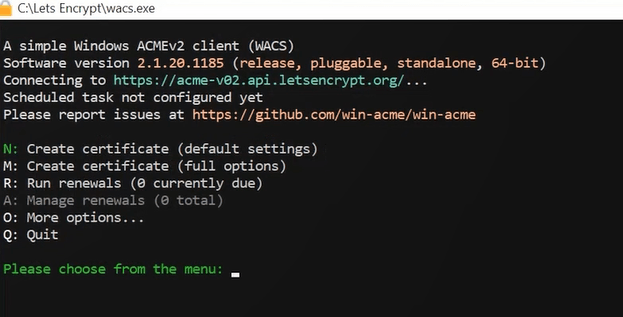
When you see Win-wacs client screen, type M to create a new certificate and press Enter.
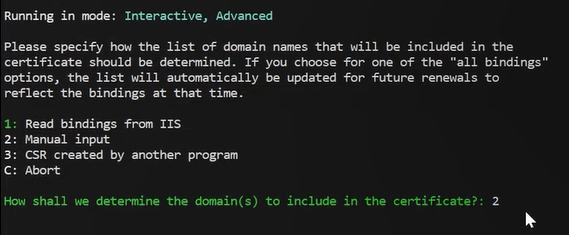
Type 2 to manually input required information, and press Enter.
On the next prompt, application will ask you to enter hostname.

You need to enter below hostnames as per your domain name. The hostnames should include your domain name, mail.domain.com, and autodiscover.domain.com. These hostnames will be added to the Subject Alternate Name of the certificate.
office365concepts.com,mail.office365concepts.com,autodiscover.office365concepts.com

Press Enter.
On the next prompt, type a name for the certificate and press Enter.
On the next prompt, application will ask you to prove ownership of the hostnames that you entered in previous step. Type 6 and press Enter to create DNS records manually to prove ownership.

On the next prompt, type 2 and press Enter.
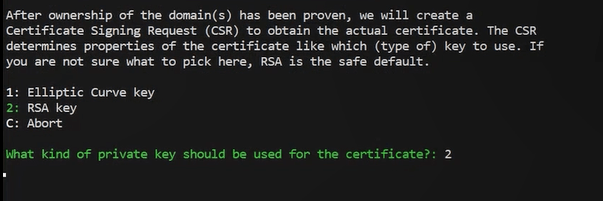
Type 4 to store the certificate in Windows Certificate Store, and press Enter.

Type 2 to store certificate in General Computer Store and press Enter.

On the next prompt type 5 and press Enter.

Type 1 to update bindings in IIS and press Enter.

On the next prompt, type 1 to select Default Web Site to create new bindings and press Enter.

On the next prompt type 2 and press Enter.

On the next prompt you will be asked to run a script.

Go to the folder where you extracted the Win-wacs files and go to Scripts folder. In this folder you will see ImportExchange PowerShell script.
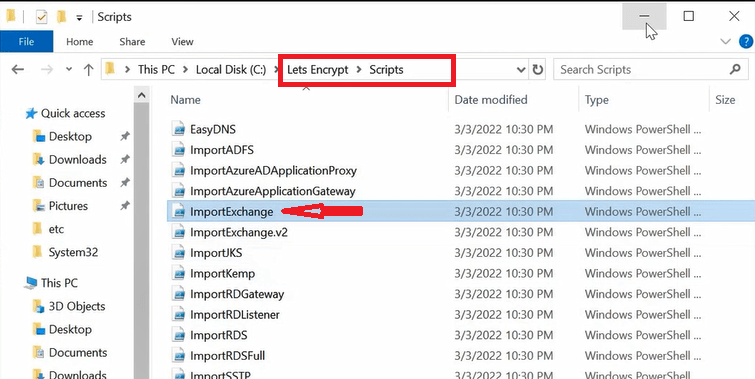
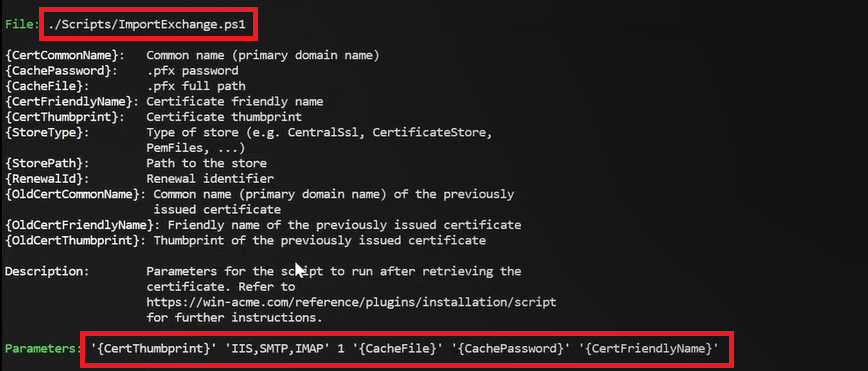
Go back to Win-wacs client and type ./Scripts/ImportExchange.ps1 and press Enter.
On the next prompt, application will ask you to enter Parameters. Type below parameters and press Enter.
‘{CertThumbprint}’ ‘IIS,SMTP,IMAP’ 1 ‘{CacheFile}’ ‘{CachePassword}’ ‘{CertFriendlyName}’
On the next prompt, type 3 and press Enter.

Type N and press Enter.
Type Y and press Enter.
On the next prompt, enter email address where you want to receive notifications and press Enter.

On the next prompt, application will ask you to add DNS records to prove ownership. Once records are added, come to back to Win-wacs client and press Enter.
Verify Free Let’s Encrypt certificate in Exchange Server
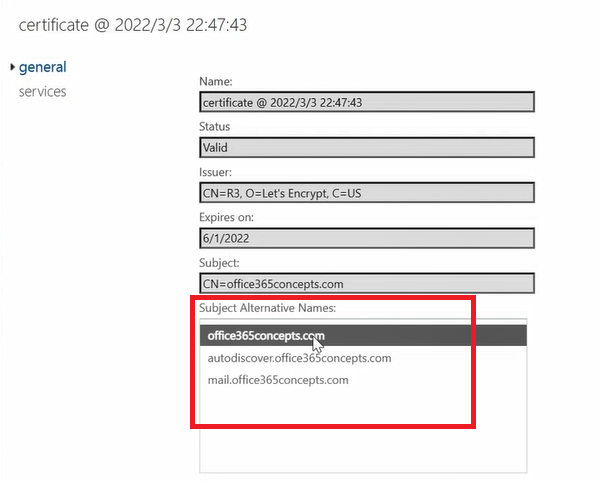
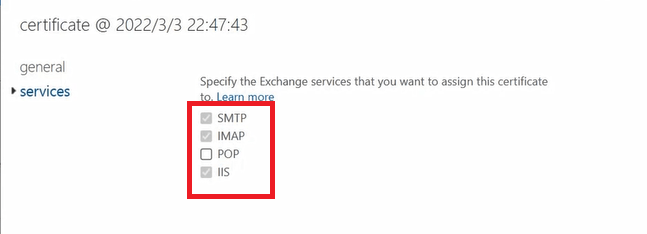
To verify Let’s Encrypt certificate in Exchange Server, go to Exchange Admin Center > Servers > Certificates.
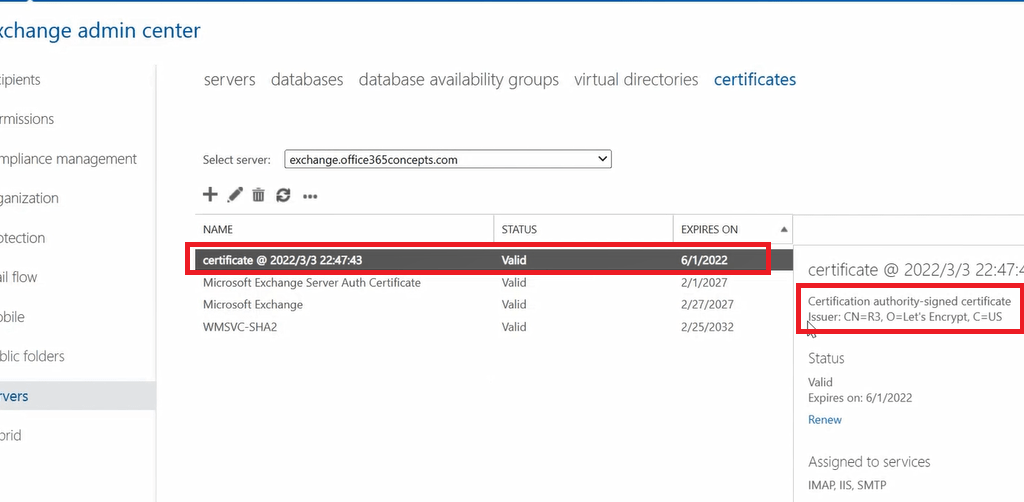
In below image you can see hostnames are added under Subject Alternative Names:
And you can see this certificate is attached with SMTP, IMAP and IIS:
Conclusion
In this blog we learnt how to create free Let’s Encrypt certificate for Exchange Server and how to install Let’s Encrypt certificate on Exchange Server 2019.
Related articles
We welcome you to browse other articles for Exchange Server 2019:
Install Active Directory on Windows Server 2019 and promote to Domain Controller
DNS records in Active Directory
Exchange Server Roles, Architecture, and Functionality Explained
Exchange Server 2019 prerequisites
Install Exchange Server 2019 on Windows Server 2019. A step by step Guide
How to configure Exchange Server 2019 post installation
Transport Pipeline in Exchange Server 2019
Configure Mail Flow in Exchange Server 2019
Happy Learning!!
