
Microsoft Purview Message Encryption / Office 365 Message Encryption (OME)
In this blog you will learn what is Office 365 Message Encryption (OME), how to set up Office 365 Message Encryption and how to troubleshoot it.
Table of Contents
Watch the video
Watch this video and learn how Office 365 Message Encryption works and how to set up Office 365 Message Encryption in your organization.
What is Microsoft Purview Message Encryption / Office 365 Message Encryption (OME)
People often use emails to exchange sensitive information, such as financial data, confidential product information or customer and employee information. As a result, mailboxes can become repositories for large amounts of potentially sensitive information. And information leakage can become a serious threat to your organization. Office 365 Message Encryption (OME) ensures that only intended recipients can view the information that your email contains.
Microsoft Purview Message Encryption or Office 365 Message Encryption (OME) or is an online service that is built on Azure Rights Management (Azure RMS). Azure RMS is part of Azure Information Protection. Office 365 Message Encryption includes Identity and Authorization policies that help you to secure your emails. We can use Encrypt only or Do not forward template to encrypt the emails.
Users can exchange protected emails within the organization or outside the organization. They can send encrypted emails to external Office 365 organizations, or to the organizations those are using GMAIL, YAHOO, Outlook.com or any other email services. Administrators can create a Mail Flow rule to apply encryption on all the emails, or on the basis of conditions those are specified within the mail flow rules. Users can also encrypt emails from OWA or Outlook client using Office 365 Message Encryption templates.
Office 365 Message Encryption licenses requirement
Office 365 Message Encryption is included in Office 365 Enterprise E3 and E5, Microsoft Enterprise E3 and E5, Microsoft 365 Business Premium, Office 365 A1, A3, and A5, and Office 365 Government G3 and G5.
If you do not have above subscription, you can purchase Azure Information Protection Plan 1 as a standalone license. This license is supported with Exchange Online Plan 1, Exchange Online Plan 2, Office 365 F1, Microsoft 365 Business Basic, Microsoft 365 Business Standard, and Office 365 Enterprise F1.
Setup Office 365 Message Encryption (OME)
Now lets understand how to enable and setup Office 365 Message Encryption (OME).
Open windows PowerShell and connect to Exchange Online and AADRM (Azure Active Directory Rights Management).
Connect-AadrmService -Credential $cred

Connect-ExchangeOnline
Run below command to enable Azure Information Protection (AIP).
Enable-Aadrm
To verify the configuration of Information Rights Management (IRM) in your organization, run below PowerShell command:
Get-IRMConfiguration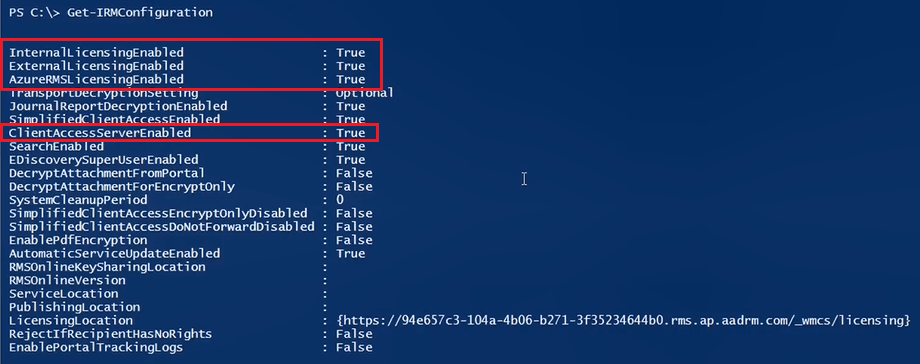
To retrieve the current list of active rights policy templates from the Active Directory Rights Management Services (AD RMS) deployment, run below PowerShell command:
Get-RMSTemplate | FL
If you want to verify if OME has been enabled and is working properly, run below PowerShell command:
Test-IRMConfiguration -Sender "email address of user to test with"

Test-IRMConfiguration -Sender securityadmin@contoso.com -Recipient "email address of a recipient"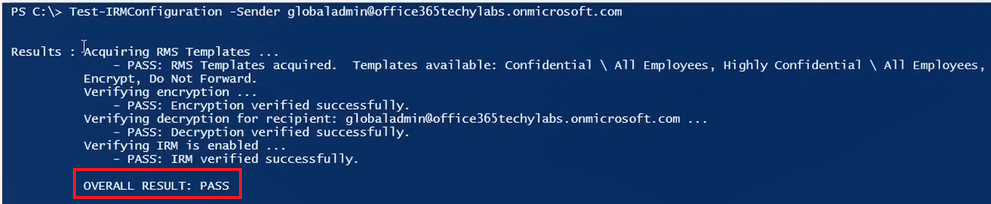
Create Office 365 Message Encryption Transport Rule
By default, Office 365 Message Encryption (OME) will be enabled for all the emails sent from your organization. But if you want to encrypt only specific emails or as per your business requirement, you can use a transport rule (mail flow rule). Follow below steps to create a transport rule to encrypt emails using RMS templates.
Go to Exchange Admin Center, click Mail Flow, and click Rules.
Click Add a rule, and click Create a new rule.
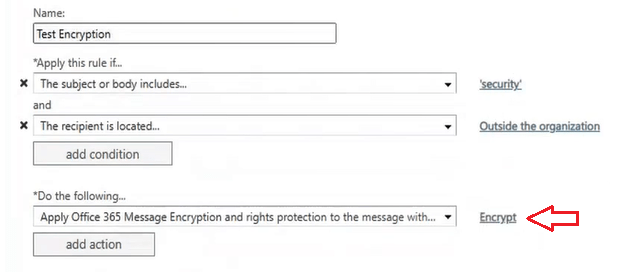
Name: Name of the rule.
Under Apply this rule if: select the condition that meets your business requirements.
Under Do the following: select Modify the message security, and select Apply Office 365 Message Encryption and rights protection.
Under select RMS template, select the template you want to use and click OK.
Test Microsoft Purview Message Encryption
When you compose an email in OWA (Outlook Web Access) or Outlook client, click Encrypt and click Change permissions as shown below:
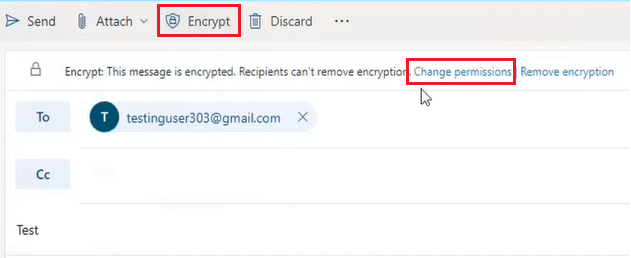
This will open Change permissions wizard. Click the drop down icon and select a RMS template that you want to use on the email.
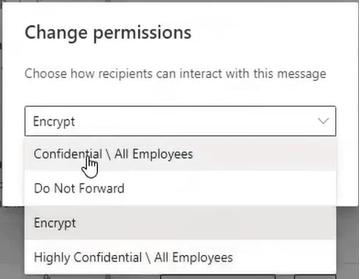
You will see the RMS template that will be used on the email as shown below:
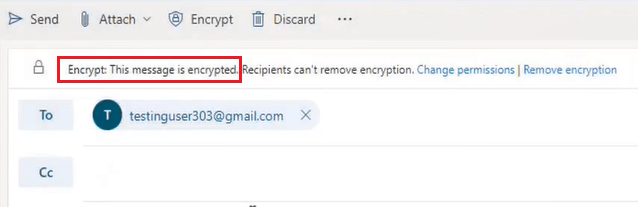
Click Send.
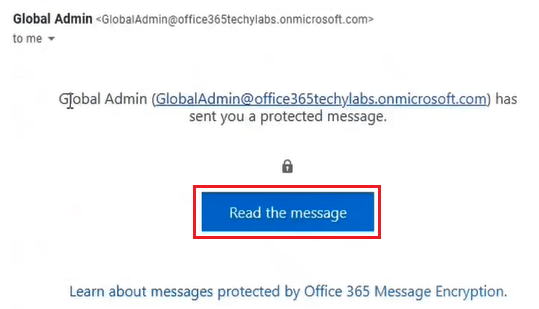
When the recipient will receive the email, he will not be able to read the content of the email. To open this email and to read the email body, he will have to provide his identity by clicking Read the message.
When user will click Read the message, he can either sign-in using his account or he can use One-time passcode.
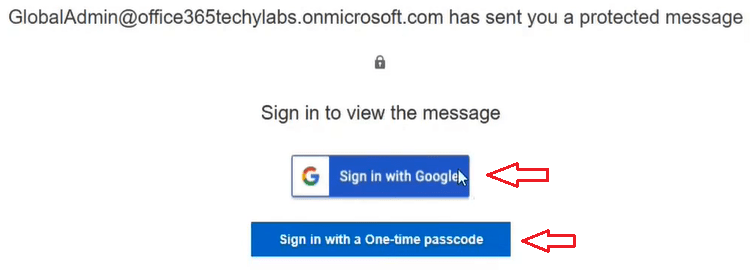
And once he has proved his identity, he will be able to open the email and read the content of the email.
RMS Templates not showing in Mail Flow Rule or in PowerShell
If RMS templates are not showing in mail flow rule or in PowerShell when running Get-RMSTemplate command, follow below PowerShell script to troubleshoot Office 365 Message Encryption.
#Connect to the Azure Rights Management service and Exchange Online.
$cred = Get-Credential
Get-Command -Module aadrm
Connect-AadrmService -Credential $cred
Connect-ExchangeOnline

#Activate the service.
Enable-Aadrm

#Get the configuration information needed for message encryption.
$rmsConfig = Get-AadrmConfiguration
$licenseUri = $rmsConfig.LicensingIntranetDistributionPointUrl

#Collect IRM configuration for Office 365.
$irmConfig = Get-IRMConfiguration
$list = $irmConfig.LicensingLocation
if (!$list) { $list = @() }
if (!$list.Contains($licenseUri)) { $list += $licenseUri }

#Enable message encryption for Office 365.
Set-IRMConfiguration -LicensingLocation $list
Set-IRMConfiguration -AzureRMSLicensingEnabled $true -InternalLicensingEnabled $true

#Enable the Protect button in Outlook on the web (Optional).
Set-IRMConfiguration -SimplifiedClientAccessEnabled $true

#Enable server decryption for Outlook on the web, Outlook for iOS, and Outlook for Android.
Set-IRMConfiguration -ClientAccessServerEnabled $true
Conclusion
In this blog we learnt what is Microsoft Purview Message Encryption (Office 365 Message Encryption), how to setup and configure message encryption, and how to troubleshoot it. You might like our other articles on Centralized Mail Flow in Exchange Hybrid and How to analyze Email Header.
If you found this article helpful, please share it within your community and do not forget to share your feedback in the comments below.
Please join us on YouTube for the latest videos on Cloud technology and join our Newsletter for the early access of the blogs and updates.
Happy Learning!!