
Office 365 email forwarding – Outlook, OWA, Exchange Forwarding
In this article you will learn how Office 365 email forwarding works. You will learn all the methods of forwarding emails in Exchange Online organization, like, Outlook Inbox rules, OWA Inbox rules, OWA email forwarding, and Exchange Online mailbox forwarding.
Table of Contents
Office 365 email forwarding
In Office 365 emails can be forwarded using various methods both by end users and administrators. These methods are explained below:
Outlook Inbox rules
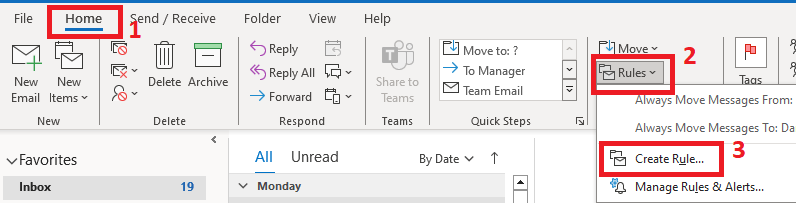
Users can create Outlook Inbox Rules to forward their emails to other users. To create email forwarding rule in Outlook, under Home tab, click Rules and click Create Rule.
On the Create Rule page, click Advanced Options.

On the Select Conditions page, select a condition, like, Sent only to me and click Next.
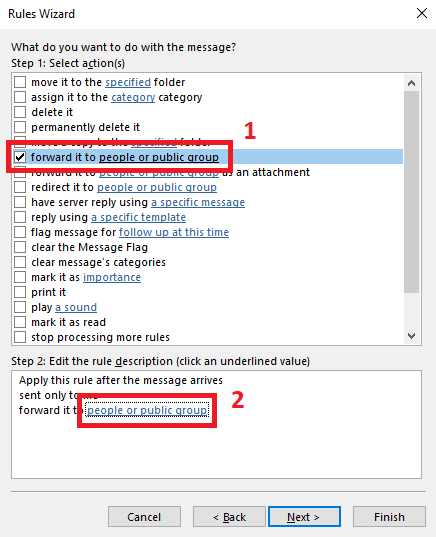
On the Section actions page, select forward it to, and under Edit the rule description, click people or public group.
On the Rule Address page, find the user from Address List double click on the user(s) to whom you want to forward the emails from your mailbox. The user will be added next to the TO field as shown below. Click OK.
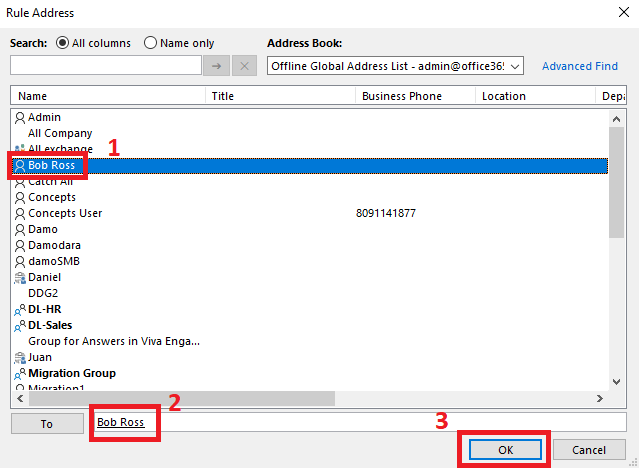
Click Next.
If you want to add exceptions within the rules, you can add them under Select exceptions.
Once done, click Next.
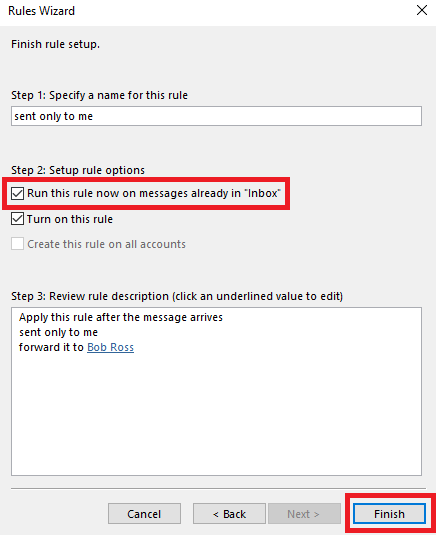
On the Finish rule setup page, check the option Run this rule now on messages already in “Inbox” and click Finish.
OWA Inbox rules
The other way to forward your emails is OWA Inbox rules. To create rules in Outlook Web Access (OWA), click the Settings (Gear icon).
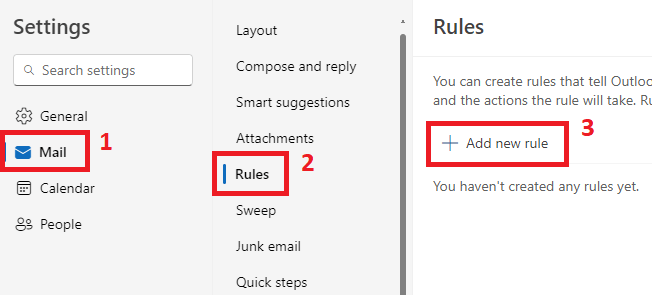
On the Settings page, select Mail, click Rules, and click Add new rule.
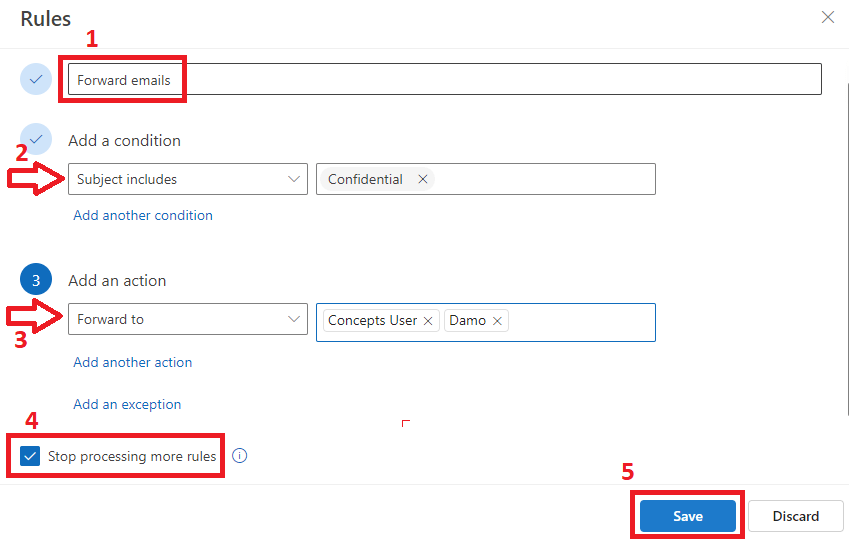
Give a name to the rule.
Under Add a condition, select a condition for the rule.
Under Add an action, select Forward to, and select the name of the users to whom you want to forward your emails.
Check the option Stop processing more rules.
Click Save.
OWA Forwarding
The 3rd method to forward emails from your Exchange Online mailbox to other users is OWA Forwarding. To set up Office 365 OWA forwarding, click Settings (Gear icon) in Outlook Web Access (OWA).
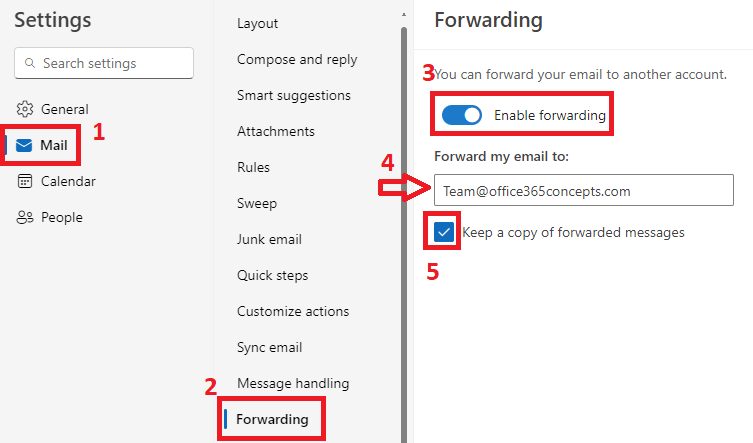
On the Settings page, select Mail, click Forwarding, toggle Enable forwarding, under Forward my email to type the email address to which you want to forward your emails, and check the option Keep a copy of forwarded messages.
Click Save.
Important: If you want to save a copy of the forwarded email in your Inbox, check the option Keep a copy of forwarded messages. If you do not need a copy of the email to be saved in your mailbox, leave the option to unchecked.
Exchange Mailbox Forwarding
And the fourth option to forward emails to other users is Exchange Mailbox Forwarding. This type of forwarding can be managed by the Global Administrators or the Exchange Administrators either from Exchange Admin Center (EAC) or using PowerShell commands.
Enable Exchange Mailbox Forwarding from EAC
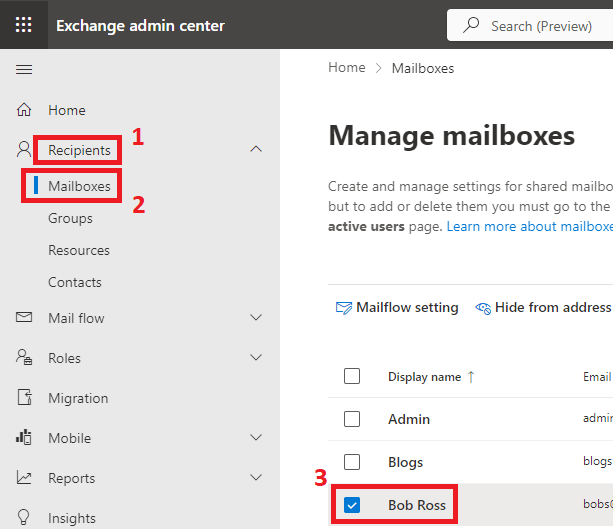
To enable mailbox forwarding from Exchange Admin Center, click Mailboxes under Recipients, and click the mailbox for which you want to enable mailbox forwarding.
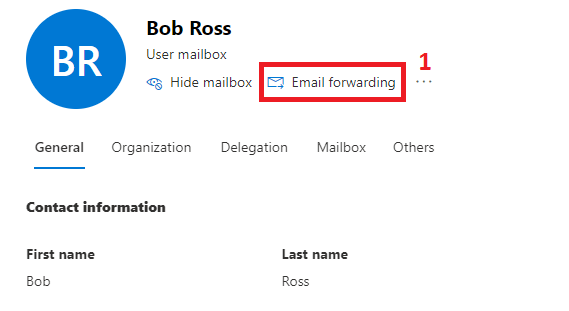
On the properties page of mailbox forwarding, click Email forwarding.
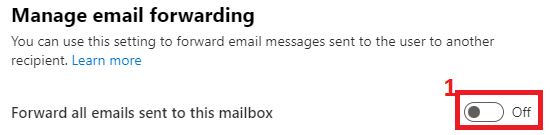
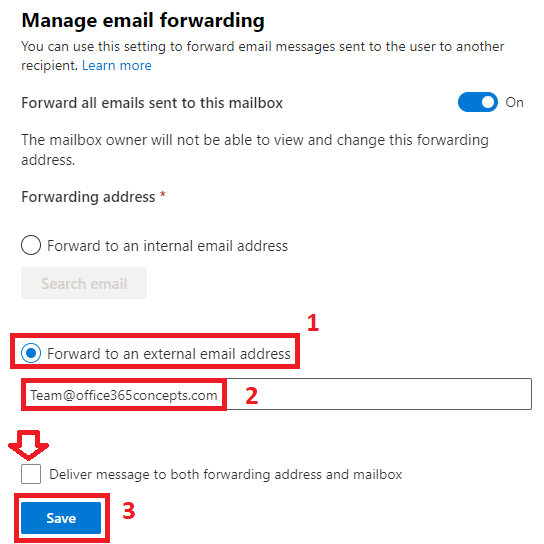
By default mailbox forwarding is disabled. Click on the enable option to turn on email forwarding.
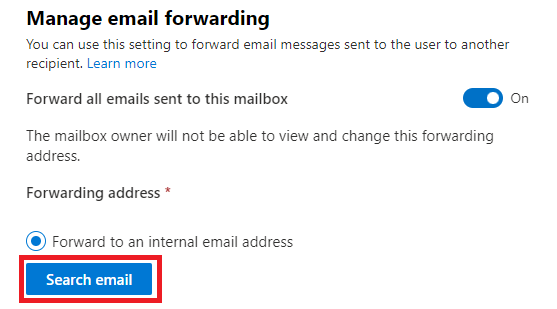
If you want to forward the emails to internal user, click Search email, and add the user from the list.
If you want to forward your emails to the external users, select Forward to an external email address, and type the email address of the external user. If you want to save a copy of the email in your mailbox, check the option Deliver messages to both forwarding address and mailbox. Click Save.
Mailbox Forwarding PowerShell commands
Now let me show you how to manage mailbox forwarding using PowerShell commands.
Connect to Exchange Online
Connect-Exchange OnlineTo display the information about mailbox forwarding of one mailbox, run below PowerShell command:
Get-Mailbox Bob | FL DeliverToMailboxAndForward,ForwardingAddress,ForwardingSmtpAddress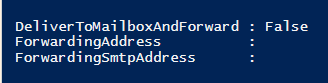
To display the information about mailbox forwarding of all the mailboxes, run below PowerShell command:
Get-Mailbox -ResultSize Unlimited | FL DeliverToMailboxAndForward,ForwardingAddress,ForwardingSmtpAddress
To find all the users with forwarding address is set to internal recipients, run below command:
Get-Mailbox | Where {$_.ForwardingsmtpAddress -ne $Null} | Select Name, ForwardingAddress,ForwardingsmtpAddress, DeliverToMailboxAndForwardTo forward emails to the internal recipient and save copy in the mailbox, run below PowerShell command:
Set-Mailbox Bob -ForwardingAddress Team@office365concepts.com -DeliverToMailboxAndForward $TrueTo forward email to the internal recipient and do not save copy in the mailbox, run below command:
Set-Mailbox Bob -ForwardingAddress Team@office365concepts.com -DeliverToMailboxAndForward $FalseTo forward emails to external recipient and save the copy in the mailbox, run below command:
Set-Mailbox Bob -ForwardingsmtpAddress office365concepts@gmail.com -DeliverToMailboxAndForward $TrueTo forward emails to external recipient and do not save a copy in the mailbox, run below command:
Set-Mailbox Bob -ForwardingsmtpAddress office365concepts@gmail.com -DeliverToMailboxAndForward $FalseHow to identity type of email forwarding
As an administrator you can check what type of email forwarding was used by the user to forward his emails to other users.
X-MS-Exchange-Inbox-Rules-Loop and X-MS-Exchange-ForwardingLoop
To verify this, you need to analyze the email header and look for below values:
X-MS-Exchange-Inbox-Rules-Loop : Email is forwarded because of the Inbox Rule.
X-MS-Exchange-ForwardingLoop: Email is forwarded because of the OWA forwarding or the mailbox forwarding.
Conclusion
In this article you learnt how mailbox forwarding is enabled in Exchange Online by the end users and the administrators.
You might like our other articles on GAL Segmentation Separate Domains in GAL and Separate users in GAL.
If you found this article helpful and informative, please share it within your community and do not forget to share your feedback in the comments below. Please join us on our YouTube channel for the latest videos on the Cloud technology and join our Newsletter for the early access of the articles and updates.
Happy Learning!!