
GAL Segmentation in Office 365 – Department based GAL Segmentation
In this article you will learn how to perform GAL segmentation in Office 365 to separate users in Global Address List (GAL) on the basis of their departments.
Scenario
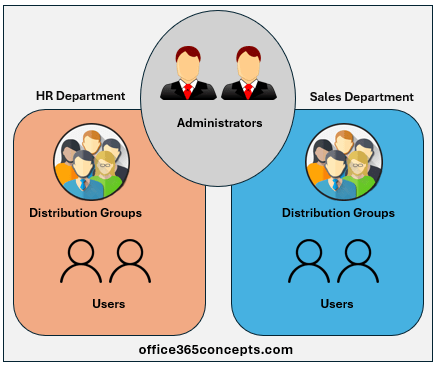
- All the users of your Office 365 tenant belong to same domain i.e., office365concepts.com.
- You have 2 or more departments in your Office 365 organization. For Example, HR and Sales.
- Users of HR department should be able to see only the users and groups of HR department.
- Users of Sales department should be able to see only the users and groups of Sales department.
- The Global Administrator or other administrators should be able to see all the users and groups including HR and Sales departments.
Table of Contents
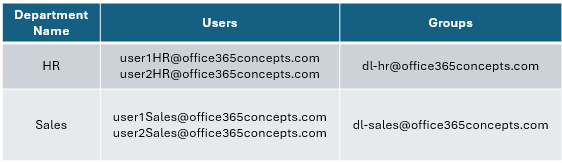
Below is the design of the Global Address List of office365concepts.com domain. If you have more users and groups in your Office 365 organization, you can follow the below instructions to separate users and groups using GAL segmentation.
As shown in the below image, User1HR@office365concepts.com can see all the users and groups in Global Address List (GAL) including the users and groups that use onmicrosoft.com domain (initial domain).
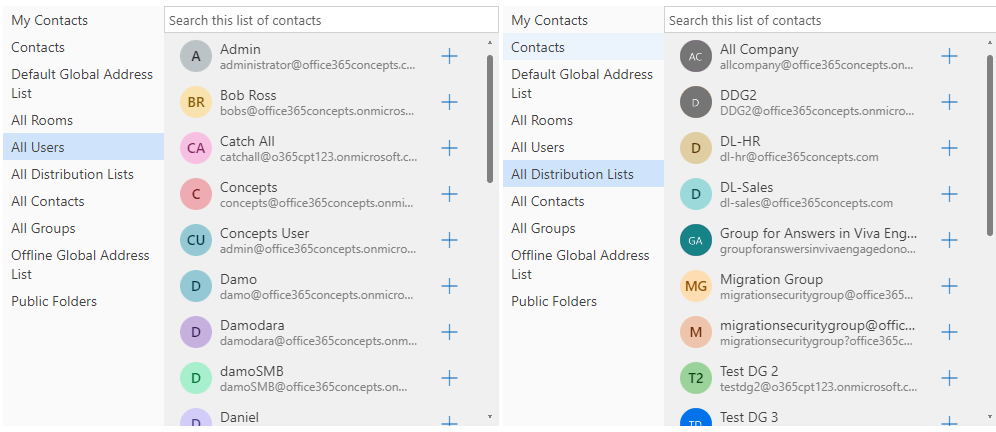
As shown in the below image, User1Sales@office365concepts.com can see all the users and groups in Global Address List (GAL) including the users and groups that use onmicrosoft.com domain (initial domain).
How to perform GAL Segmentation in Office 365
Now let’s separate the users and groups as per their departments and let’s understand how GAL segmentation works in Office 365.
Step 1. Connect to Exchange Online
Open Windows PowerShell and run below command to connect to Exchange Online.
Connect-ExchangeOnlineStep 2. Enable Organization Customization
Run below PowerShell command to enable organization customization.
Enable-OrganizationCustomizationStep 3. Create RBAC group for Address Lists permission
In the next step we will create new RBAC role group for Address Lists and will add the administrator account as member.
Important: Creating RBAC group for Address Lists permission from Exchange Admin Center can take up to 24 hours for replication. I recommend you to assign this role group using PowerShell command as it takes lesser time for replication as compare to the changes done from GUI. Once role is assigned using PowerShell command, wait for sometime, close Windows PowerShell and open a new window. and connect to Exchange Online PowerShell again.
Create RBAC group from Exchange Admin Center (EAC)
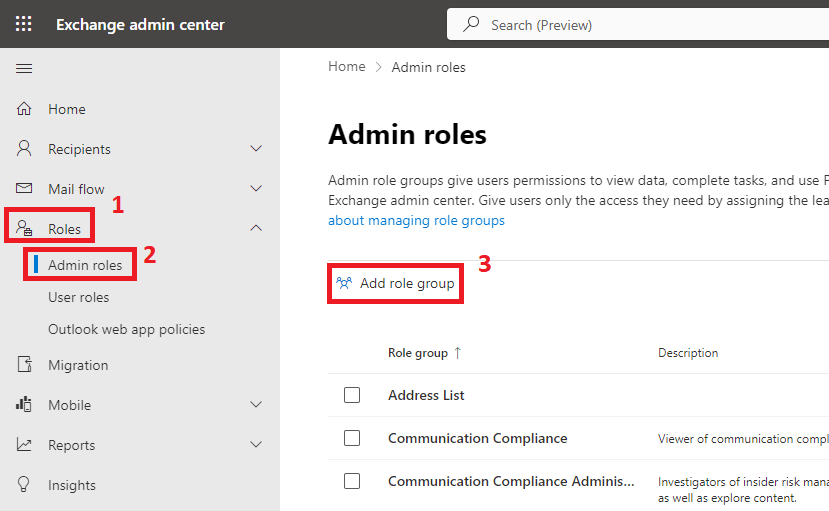
To create role group from Exchange Admin Center (EAC), expand Roles, click Admin roles, and click Add role group.
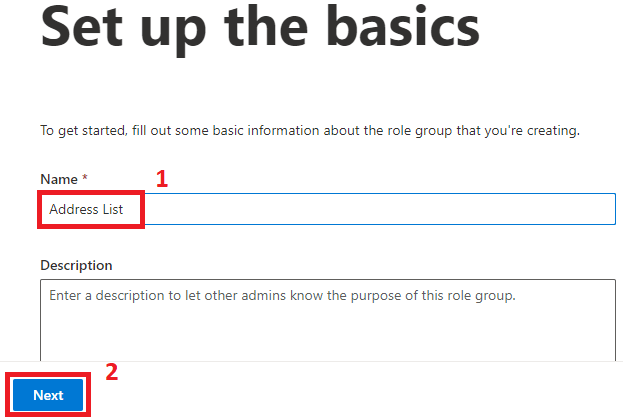
On the Set up the basics page, type a name for the role group and click Next.
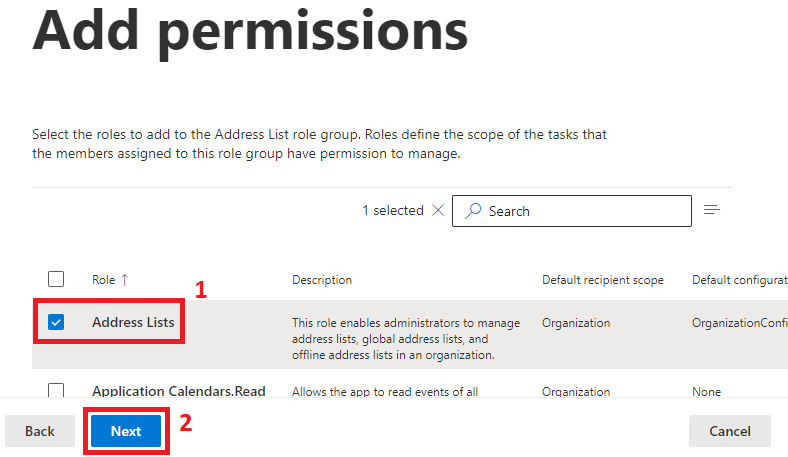
On the Add permissions page, select Address lists permission and click Next.
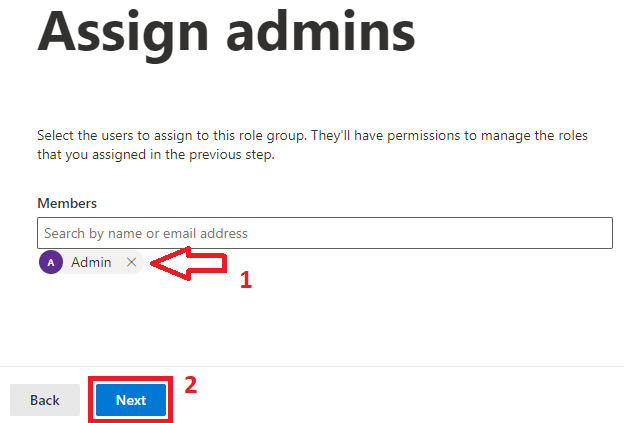
On the Assign admins page add the administrator account that is going to make changes in Global Address List (GAL).
On the Review role group and finish page, click Add role group.
Create RBAC group using PowerShell
To create a role group using PowerShell, run below command.
New-RoleGroup -Name "Address List" -Roles "Address Lists" -Members admin@office365concepts.comThe above command will create a role group with name Address List, it will add Address Lists permission in the role group, and will assign this role group to admin@office365concepts.com.
Step 4. Enable address book policy routing
Address book policy routing controls how recipients are resolved in an organization that uses address book policies to create separate virtual organizations within the same Exchange organization. Run below command to enable address book policy routing:
Set-TransportConfig –AddressBookPolicyRoutingEnabled $TrueStep 5. Update Custom Attribute for users and groups using PowerShell
In the next step of GAL segmentation, we will update the Custom Attribute value for the users and groups. We will add a value HR in CustomAttribute1 for the users and groups that belong to HR department, and we will add value Sales in the CustomAttribute1 for the users and groups that belong to Sales department. You can update custom attribute value by using Exchange Admin Center (EAC) or PowerShell. We will use PowerShell commands to update custom attribute.
Update custom attribute for users and groups of HR department
Run below commands to update CustomAttribute1 for users of HR department:
Set-Mailbox -Identity user1hr@office365concepts.com -CustomAttribute1 "HR"

Set-Mailbox -Identity user2hr@office365concepts.com -CustomAttribute1 "HR"
To verify custom attribute value for users, please run below command:
Get-Mailbox | Where-Object {$_.CustomAttribute1 -eq "HR"} | Select-Object DisplayName
To update CustomAttribute1 value for the groups in HR department, run below command:
Set-DistributionGroup -Identity dl-hr@office365concepts.com -CustomAttribute1 "HR"To verify custom attribute value for the groups, please run below command:
Get-DistributionGroup | Where-Object {$_.CustomAttribute1 -eq "HR"} | Select-Object DisplayNameUpdate custom attribute for users and groups of Sales department
Run below commands to update CustomAttribute1 for users of Sales department:
Set-Mailbox -Identity user1sales@office365concepts.com -CustomAttribute1 "Sales"

Set-Mailbox -Identity user2sales@office365concepts.com -CustomAttribute1 "Sales"
To verify custom attribute value for users, please run below command:
Get-Mailbox | Where-Object {$_.CustomAttribute1 -eq "Sales"} | Select-Object DisplayName
To update CustomAttribute1 value for the groups in Sales department, run below command:
Set-DistributionGroup -Identity dl-sales@office365concepts.com -CustomAttribute1 "Sales"To verify custom attribute value for the groups, please run below command:
Get-DistributionGroup | Where-Object {$_.CustomAttribute1 -eq "Sales"} | Select-Object DisplayNameStep 6. Create Address Lists
In the next step of GAL Segmentation in Office 365, we will create Address Lists for both HR and Sales departments.
Create Address List for HR department
Run below command to create address list for HR department:
New-AddressList -Name "AL_HR" -RecipientFilter {((RecipientType -eq 'UserMailbox') -or (RecipientType -eq "MailUniversalDistributionGroup") -or (RecipientType -eq "DynamicDistributionGroup")) -and (CustomAttribute1 -eq "HR")}Create Address List for Sales department
Run below command to create address list for Sales department:
New-AddressList -Name "AL_Sales" -RecipientFilter {((RecipientType -eq 'UserMailbox') -or (RecipientType -eq "MailUniversalDistributionGroup") -or (RecipientType -eq "DynamicDistributionGroup")) -and (CustomAttribute1 -eq "Sales")}Step 7. Create Global Address Lists (GAL)
In the next step of GAL Segmentation, we will create Global Address Lists using PowerShell commands for HR and Sales departments.
Create Global Address List for HR department
To create Global Address List (GAL) for HR department, run below PowerShell command:
New-GlobalAddressList -Name "GAL_HR" -RecipientFilter {(CustomAttribute1 -eq "HR")}
Create Global Address List for Sales department
To create Global Address List (GAL) for Sales department, run below PowerShell command:
New-GlobalAddressList -Name "GAL_Sales" -RecipientFilter {(CustomAttribute1 -eq "Sales")}
Step 8. Create Offline Address Books
In the next step, we will create Offline Address Books for HR and Sales departments.
Create Offline Address Book for HR department
Run below PowerShell command to create Offline Address Book for HR department:
New-OfflineAddressBook -Name "OAB_HR" -AddressLists "GAL_HR"Create Offline Address Book for Sales department
Run below PowerShell command to create Offline Address Book for Sales department:
New-OfflineAddressBook -Name "OAB_Sales" -AddressLists "GAL_Sales"Step 9. Create Address Book Policies for HR and Sales departments
In the next step, we will create 2 address book policies using PowerShell commands.
Create Address Bool Policy for HR department
Run below PowerShell command to create address book policy for HR department:
New-AddressBookPolicy -Name "ABP_HR" -AddressLists "AL_HR" -OfflineAddressBook "\OAB_HR" -GlobalAddressList "\GAL_HR" -RoomList "\All Rooms"
Create Address Book Policy for Sales department
Run below PowerShell command to create address book policy for Sales department:
New-AddressBookPolicy -Name "ABP_Sales" -AddressLists "AL_Sales" -OfflineAddressBook "\OAB_Sales" -GlobalAddressList "\GAL_Sales" -RoomList "\All Rooms"
Step 10. Assign address book policies
In this step we will assign address book policies to the user accounts of HR and Sales departments.
Assign address book policy to users of HR department
Run below command to assign address book policy to the users of HR department.
Get-Mailbox | where {$_.CustomAttribute1 -eq "HR"}| Set-Mailbox -AddressBookPolicy "ABP_HR" To verify, please run below command:
Get-Mailbox | where {$_.CustomAttribute1 -eq "HR"}| Select-Object AddressBookPolicy
Assign address book policy to users of Sales department
Run below command to assign address book policy to the users of Sales department.
Get-Mailbox| where {$_.CustomAttribute1 -eq "Sales"}| Set-Mailbox -AddressBookPolicy "ABP_Sales"To verify, please run below command:
Get-Mailbox | where {$_.CustomAttribute1 -eq "Sales"}| Select-Object AddressBookPolicy
Note: We will not create or apply Address Book Policy to the administrators as they will use default Global Address List (GAL) and Address Book Policy (ABP).
Results
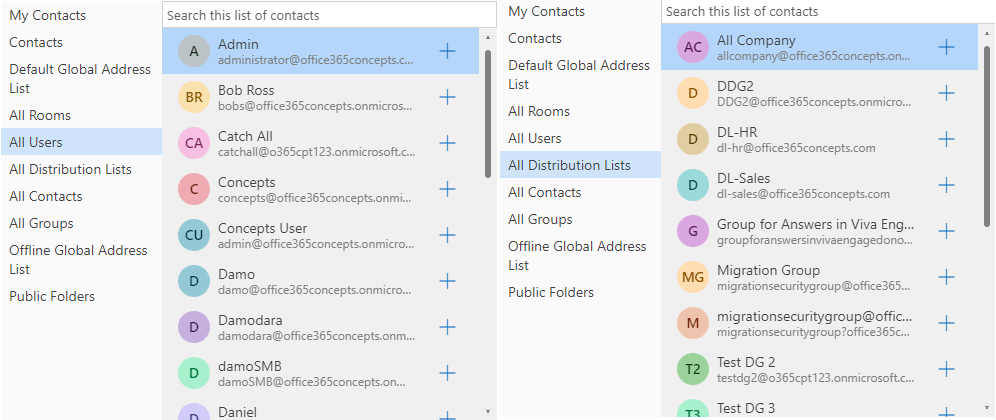
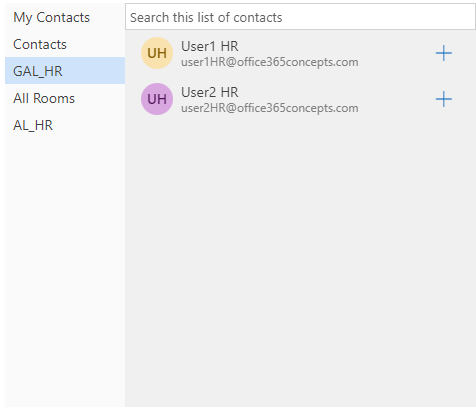
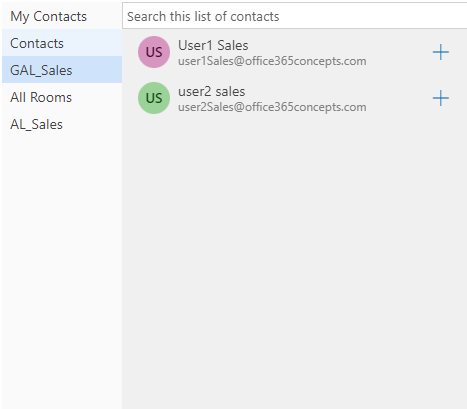
In the below image you can see the users from HR and Sales departments have separate address lists.
Conclusion
In this article you learn how to perform GAL Segmentation in Office 365, and how to separate the users and groups on the basis of their departments.
You might like our other article on Save sent emails in Shared Mailbox sent items folder.
If you found this article helpful and informative, please share it within your community and do not forget to share your feedback in the comments below. Please join us on our YouTube channel for the latest videos on the Cloud technology and join our Newsletter for the early access of the articles and updates.
Happy Learning!!