
Manage user mailbox using PowerShell
In this article you will learn how to manage user mailbox using PowerShell commands. You will learn how to create bulk user mailbox using CSV file, how to manage mailbox permissions, how to manage calendar permissions, how to manage mailbox properties, how to soft delete mailbox and how to restore them, and how to hard delete user mailbox in Exchange Online.
Table of Contents
Manage user mailbox using PowerShell
Connect to Exchange Online PowerShell
Before you run below PowerShell commands, you need to connect to Exchange Online PowerShell module. Open Windows PowerShell as administrator and run below commands one by one:
Set-ExecutionPolicy -ExecutionPolicy RemoteSigned -Scope CurrentUser
Install-Module -Name ExchangeOnlineManagement
Import-Module ExchangeOnlineManagement
Connect-ExchangeOnline
Create a user mailbox using PowerShell
To create a user mailbox using PowerShell, we will use New-Mailbox PowerShell command as shown below:
New-Mailbox -Name "Bob Ross" -DisplayName "Bob Ross" -FirstName "Bob" -LastName "Ross" -MicrosoftOnlineServicesID bobross@office365concepts.com -Alias "BobR" -Password (ConvertTo-SecureString -String 'P@s$w0rd' -AsPlainText -Force) -ResetPasswordOnNextLogon $trueThe above command will create a user mailbox in Exchange Online, will set user mailbox properties as defined in the command, it will set a password for the account associated with this mailbox, and will give a prompt to the user to reset his password on the first login attempt.
Important: When you will create a user mailbox using PowerShell, you will receive a warning that says “After you create a new mailbox, you must go to the Office 365 Admin Center and assign the mailbox a license, or it will be disabled after the grace period“. The grace period to assign a license to this user account is 30 days. Once you will assign an Exchange Online license to this user account, the mailbox will be attached to the account.
List user mailboxes using PowerShell
In this example we will find all the user mailboxes in Exchange Online organization using PowerShell. To achieve this, we will use Get-Mailbox PowerShell command as shown below:
Get-Mailbox -ResultSize Unlimited | Where-Object {$_.RecipientTypeDetails -eq "UserMailbox"} | Select-Object DisplayName,PrimarySmtpAddressExport user mailbox to CSV Office 365
In this example we will list all the user mailboxes and then we will export the output in a CSV file.
Replace “C:\CSV Files\ExportUsers.CSV” with the actual path where you want to save CSV file and run below PowerShell command:
Get-Mailbox -ResultSize Unlimited | Where-Object {$_.RecipientTypeDetails -eq "UserMailbox"} | Select-Object DisplayName,PrimarySmtpAddress | Export-CSV "C:\CSV Files\ExportUsers.CSV" –NoTypeInformation -Encoding UTF8Check user mailbox size Office 365 using PowerShell
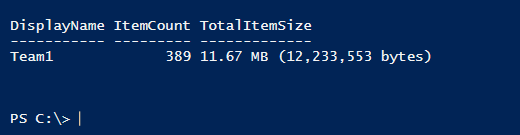
To check size of a user mailbox using PowerShell, run below PowerShell command:
Get-MailboxStatistics -Identity "Team1" | Select-Object DisplayName, ItemCount, TotalItemSizeThe above PowerShell command will display the total items count in a mailbox and the total item size as shown below:
Check all user mailboxes size using PowerShell
To check size of all the mailboxes in Exchange Online, run below PowerShell command:
Get-Mailbox -ResultSize Unlimited | Where-Object {$_.RecipientTypeDetails -eq "UserMailbox"} | Get-MailboxStatistics | Select-Object DisplayName, ItemCount, TotalItemSizeAssign Full Access Permission on a user mailbox
In this example a user “Concepts” needs Full Access permission on a user mailbox “Sabina” so that he can add Sabina’s mailbox in Outlook application or Outlook Web Access (OWA). To assign Full Access permission, we will use Add-MailboxPermission command along with -AccessRights parameter as shown below:
Add-MailboxPermission -Identity "Sabina" -User "Concepts" -AccessRights FullAccess -InheritanceType AllAssign Full Access permission on User Mailbox with Auto Mapping enabled
Full Access permission offers a feature Auto Mapping that automatically adds a mailbox to a user’s Outlook profile when Full Access permissions are granted to that user. This means that when a user is given Full Access permission to a mailbox (shared mailbox / room mailbox / user mailbox) along with Auto Mapping, Outlook will automatically display the mailbox in their mailbox list without needing to manually add it.
To assign Full Access permission on a user mailbox along with Auto Mapping feature enabled, use below PowerShell command:
Add-MailboxPermission -Identity "Sabina" -User "Concepts" -AccessRights FullAccess -InheritanceType All -AutoMapping $trueThe above command will assign Full Access permission to “Concepts” on “Sabina” mailbox and will enable Auto Mapping.
Assign Send As permission on User Mailbox
In this scenario we will assign Send As permission to “Concepts” on a user mailbox “Sabina” so that he can send emails using Sabina’s mailbox email address.
Add-RecipientPermission -Identity "Sabina" -Trustee "Concepts" -AccessRights SendAsAssign Send on Behalf permission on user Mailbox
In this example we will assign Send on Behalf permission to a user “Concepts” on another user mailbox “Sabina”.
Set-Mailbox -Identity "Sabina" -GrantSendOnBehalfTo "Concepts"Remove Full Access permission from a User Mailbox
To remove Full Access for a user on Shared Mailbox, run below PowerShell command:
Remove-MailboxPermission -Identity "Sabina" -User "Concepts" -AccessRights FullAccess -InheritanceType AllRemove SendAs permission from a User Mailbox
In this example we will remove SendAs permission for a shared mailbox.
Remove-RecipientPermission -Identity "Sabina" -Trustee "Concepts" -AccessRights SendAsRemove Send on Behalf permission from a user mailbox
To remove Send on Behalf permission for a shared mailbox, run below PowerShell command:
Set-Mailbox -Identity "Sabina" -GrantSendOnBehalfTo $nullIncrease / Customize User Mailbox size
In Exchange Server (on-premises or Exchange Online), every mailbox has storage quota that defines the size of a mailbox. Every mailbox has 3 quota parameters as explained below:
- IssueWarningQuota – The IssueWarningQuota parameter specifies the warning threshold for the size of the mailbox. If the mailbox reaches or exceeds this size, the user receives a warning message.
- ProhibitSendQuota – The ProhibitSendQuota parameter specifies a size limit for the mailbox. If the mailbox reaches or exceeds this size, the mailbox can’t send new emails, and the user receives a warning message.
- ProhibitSendReceiveQuota – The ProhibitSendReceiveQuota parameter specifies a size limit for the mailbox. If the mailbox reaches or exceeds this size, the mailbox can’t send or receive new emails. Messages sent to the mailbox are returned to the sender with an error message. This value determines the maximum size of the mailbox.
To customize a mailbox size, run below PowerShell command:
Set-Mailbox "Concepts" -ProhibitSendQuota 50GB -ProhibitSendReceiveQuota 50GB -IssueWarningQuota 49GBConclusion
In this article you learnt how to manage user mailbox using PowerShell commands. You might like our other article on Manage shared mailbox using PowerShell.
If you found this article helpful and informative, please share it within your community and do not forget to share your feedback in the comments below.
Please join us on YouTube for the latest videos on the Cloud technology and join our Newsletter for the early access of the articles and updates.
Happy Learning!!