
Exchange Hybrid Migration – A Complete Guide
Dive into our comprehensive guide on Exchange Hybrid Migration Step by Step and learn how to meet Exchange Hybrid prerequisites and how to seamlessly migrate mailboxes from Exchange server 2019 to Microsoft 365.
Table of Contents
Watch the video
Watch this video to learn how to perform Exchange Hybrid mailbox migration from Exchange server 2019 to Microsoft 365.
What is Hybrid Migration
Hybrid Migration refers to the process of seamlessly integrating and transitioning email services between on-premises servers (Microsoft Exchange Server) and cloud-based services (Microsoft 365 or Office 365).
This approach allows organizations to maintain a coexistence of both on-premises and cloud environments during the migration period, ensuring a gradual and controlled shift of mailboxes and data. Hybrid Migrations are commonly employed when organizations want to leverage the benefits of cloud-based email services while still retaining some components on their local servers. This strategy facilitates a smooth transition, minimizes disruptions, and provides flexibility in managing email services across Exchange hybrid environments.
Exchange Hybrid migration step by step
In this Hybrid migration Office 365 guide we will learn how to make sure all the requirements for Exchange hybrid migration are met and how to seamlessly migrate mailboxes from on-premises to Microsoft 365.
Step 1: Hybrid Migration Endpoint – EWS (Default Web Site)
When we run Exchange Hybrid Configuration Wizard (HCW), it creates a migration endpoint in Exchange online with name Hybrid Migration Endpoint – EWS (Default Web Site). You can use this migration endpoint to move on-premises mailboxes to Microsoft 365 and from Microsoft 365 to on-premises.
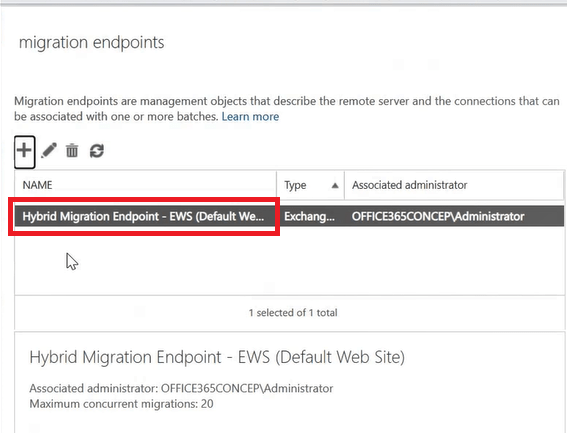
You can also run below PowerShell command in Exchange online PowerShell to check migration endpoints:
Get-MigrationEndpoint | FLStep 2: Enable MRS Proxy service in Exchange server
Exchange Hybrid Migration use Mailbox Replication Service (MRS) for moving the mailboxes. Hence you need to make sure that MRS Proxy service is running on your on-premises Exchange server.
To verify if MRS Proxy service is running on your on-premises Exchange server, go to Exchange Management Shell and run below command:
Get-WebservicesVitualDirectory | FL *MRS*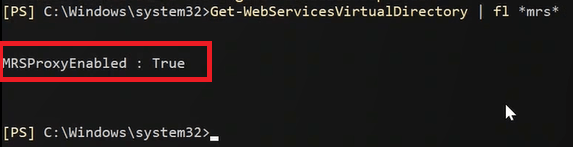
You can also use Exchange Admin Center to verify if MRS Proxy service is enabled on your Exchange server. Go to Exchange admin center, click servers, click virtual directories and double clock EWS (Default Web Site) virtual directory.
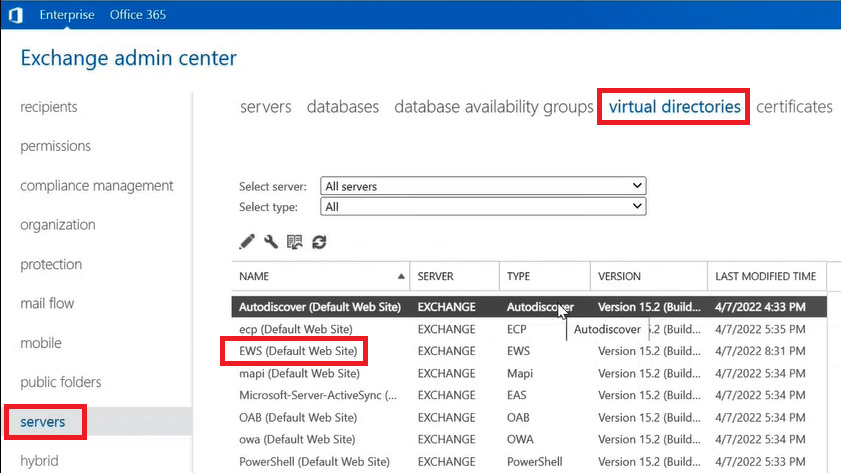
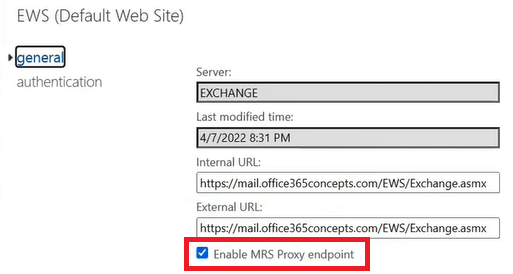
And make sure Enable MRS Proxy endpoint is checked as shown below:
Step 3: Verify Mail Users in Microsoft 365
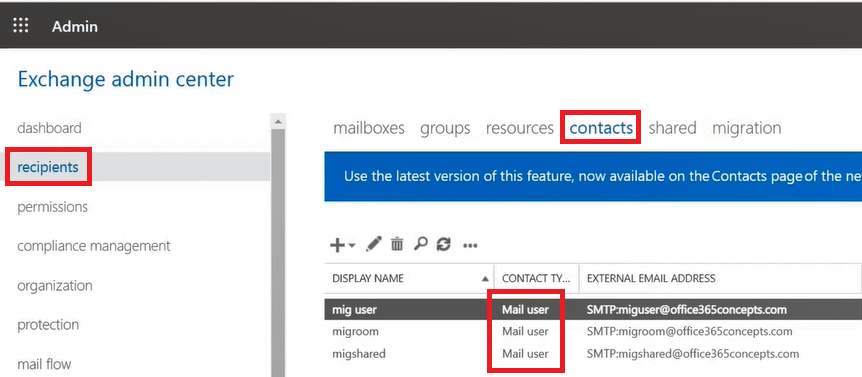
The most important part in Exchange hybrid migration is, the mailboxes you want to migrate from on-premises Exchange server, should be synchronized to Microsoft 365 as mail enabled Mail Users.
When you deploy Microsoft Entra Connect or Azure AD Connect and you run Hybrid Configuration Wizard, on-premises user accounts are synchronized to Microsoft 365 as mail enabled Mail Users. To verify Mail Users, go to Microsoft 365 Exchange Admin Center, click Recipients and click Contacts.
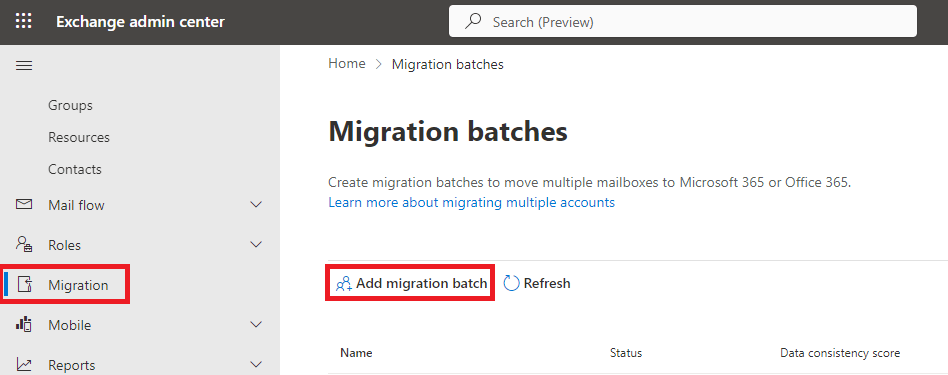
Step 4: Create Migration Batch
To create a migration batch go to Microsoft 365 Exchange Admin Center, click Migration, and click Add migration batch.
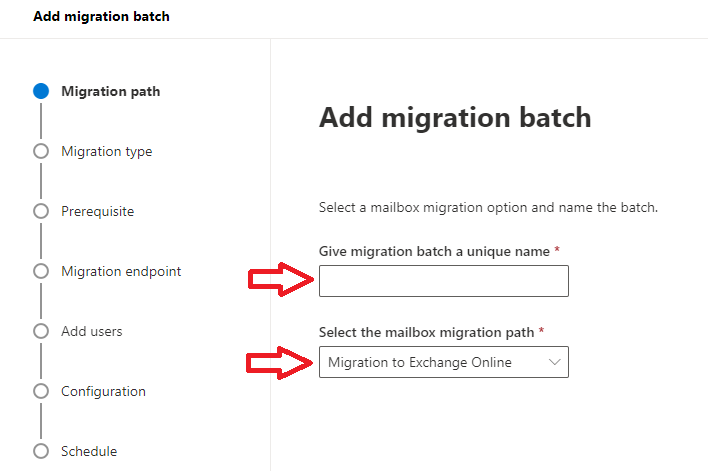
On the Add migration batch page, type a unique name for the batch and under Select the mailbox migration path select Migration to Exchange Online.
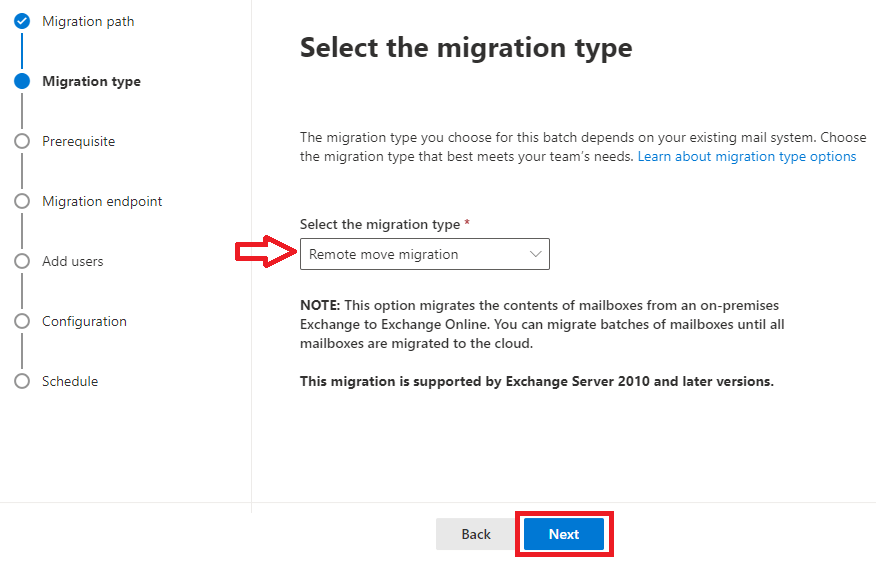
On the Select the migration type page, under Select the migration type select Remote move migration and click Next.
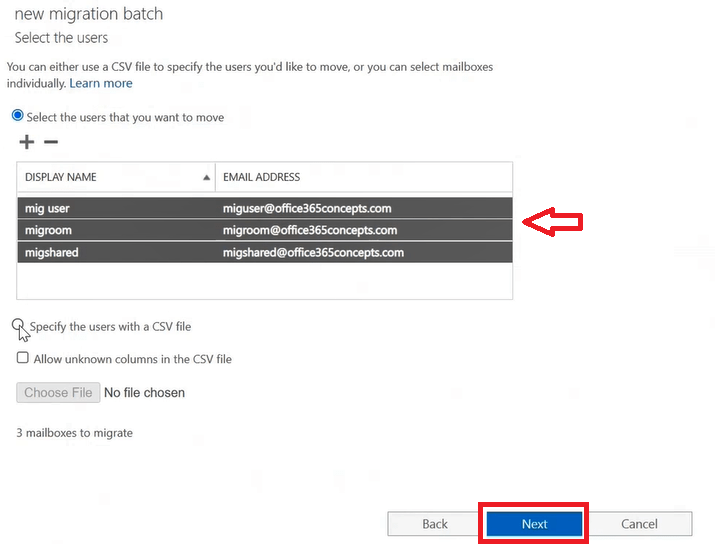
On the Select the users page, select the Mail Users manually or upload them using a CSV file and click Next.
On the Confirm the migration endpoint page type Fully Qualified Domain Name (FQDN) of the on-premises Exchange server as shown below, and start the migration batch.

Once the migration batch is completed, go to Exchange Management Shell and run Get-RemoteMailbox. You will see the on-premises mailboxes are converted to remote mailboxes.

Important: As we have discussed in this link, when Exchange hybrid mailbox migration reaches 95%, the on-premises mailboxes are converted to remote mailboxes and are moved to soft deleted state.
To view soft deleted mailboxes, run below command in Exchange Management Shell in on-premises Exchange server:
Get-MailboxStatistics -Database "Database Name" | where {$_.DisconnectReason -match "SoftDeleted"}
Step 5: Assign license
Once migration batch is completed, assign Microsoft 365 licenses to the migrated user accounts that have Exchange Online service included so that a mailbox can be provisioned for the users.
Conclusion
In this blog we learnt how to meet Exchange hybrid mailbox migration requirements and how to migrate on-premises mailboxes to Exchange online step by step.
You might like our other articles on Background process of Exchange Hybrid Migration and Background process of Hybrid Configuration Wizard (HCW).
If you found this article helpful, please share it within your community and do not forget to share your feedback in the comments below. Please join us on our YouTube channel for the latest videos on Cloud technology and join our Newsletter for the early access of the blogs and updates.
Happy Learning!!