
How to whitelist a domain in Office 365
In this article you will learn how to whitelist a domain in Office 365 using Transport rules (mail flow rules), Anti-spam policies, and Microsoft Defender Submissions.
Emails sent from external domain are getting marked as Spam by Exchange Online Protection (EOP).
Table of Contents
Whitelisting domains in Office 365 typically refers to the process of allowing certain email addresses or domains to bypass spam filters and other security measures in Exchange Online Protection (EOP). This can be useful when you want to ensure that emails from specific trusted senders are delivered without being marked as spam.
How to whitelist a domain in Office 365
If you do not want Exchange Online Protection filter agents to take any action on the emails sent from a particular domain, you can whitelist that domain using Mail Flow rules, Anti-Spam policy or Microsoft Defender Submissions. In this article we will discuss all the possible ways to whitelist a domain in Office 365.
Whitelist domain in Microsoft Defender Submissions
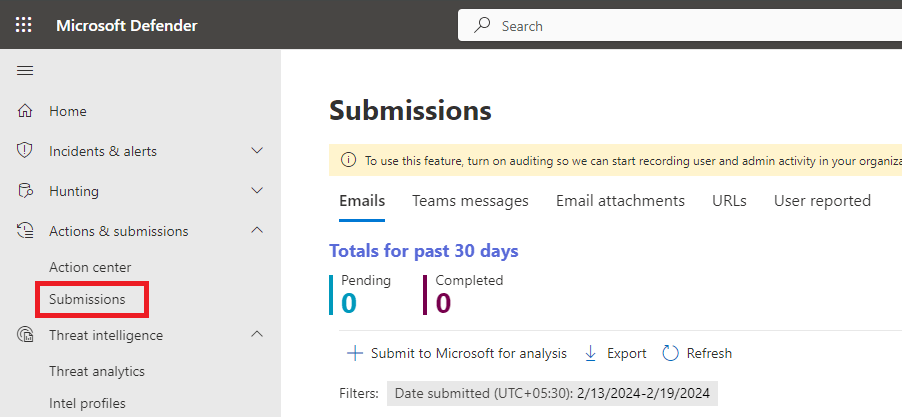
As an administrator you can use Tenant Allow/Block List to bypass Exchange Online Protection in Office 365. The Tenant Allow/Block List in the Microsoft Defender portal gives you a way to manually override the Defender for Office 365 or EOP filtering verdicts. You can’t create allow entries for domains and email addresses directly in the Tenant Allow/Block List. To add Domains, Email Addresses, Files or URLs in Tenant Allow/Block List, go to Microsoft Defender, expand Actions & submissions and click Submissions.
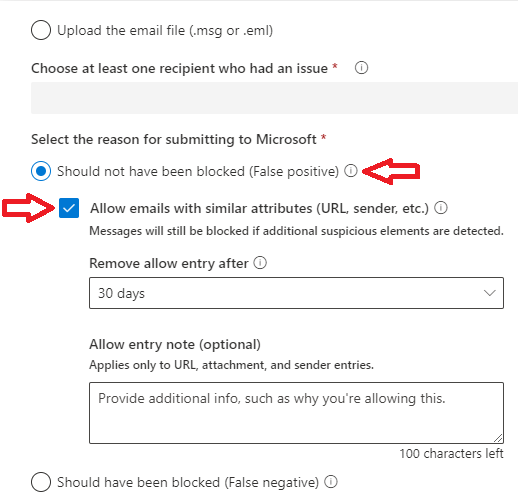
While submitting Emails in the Submission portal, select Should not have been blocked (False positive), and check Allow emails with similar attributes (URL, sender, etc.).
Transport rule to bypass Spam filtering
As a Global Administrator or Exchange Administrator you can come across a scenario where you want to allow emails or you do not want Anti-Spam Filter policies to take action on those emails. In such scenarios you can create a mail flow rule or transport rule to bypass Spam Filtering in Exchange Online Protection (EOP) organizations.
Go to Exchange Admin Center > Mail Flow > Rules, click Add a rule and click Create a new rule.
- Give this rule a relevant name like “Bypass Spam Filtering”.
- Under Apply this rule if select The sender and then select domain is and type the domain name for which you want to bypass Spam Filtering. You can also specify the IP address of the application/website from where you are relaying the emails. Under Apply this rule if select The sender and then select IP address is in any of these ranges or exactly matches and then add the IP address.
- Under Do the following, select Modify the message properties and select set the spam confidence level (SCL) and select Bypass spam filtering.
- If you want to add exception on this rule, you can add it under Except if.
- Click Next.
- Under Rule mode select Enforce.
- Under Severity select High.
- Check Stop processing more rules option.
- Click Next and click Finish.
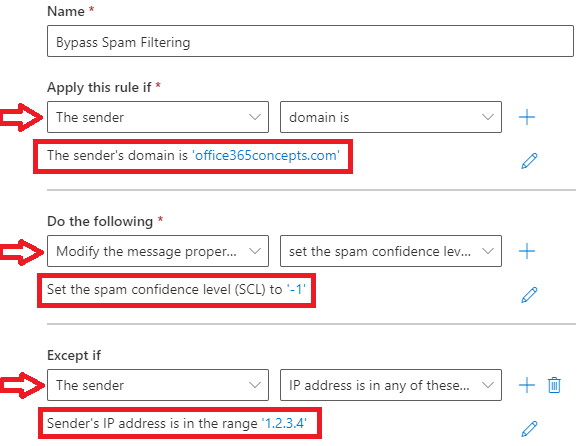
Important: When this transport rule will process the email, Exchange Online Protection Spam Filtering Agent (SFA) will skip this email, and it will add Spam Filtering Verdict (SFV) as SFV:SKN and Spam Confidence Level (SCL) will be set to SCL-1. You can find these values under X-Forefront-AntiSpam-Report section within the email header.
Whitelist domain in Anti-spam policies
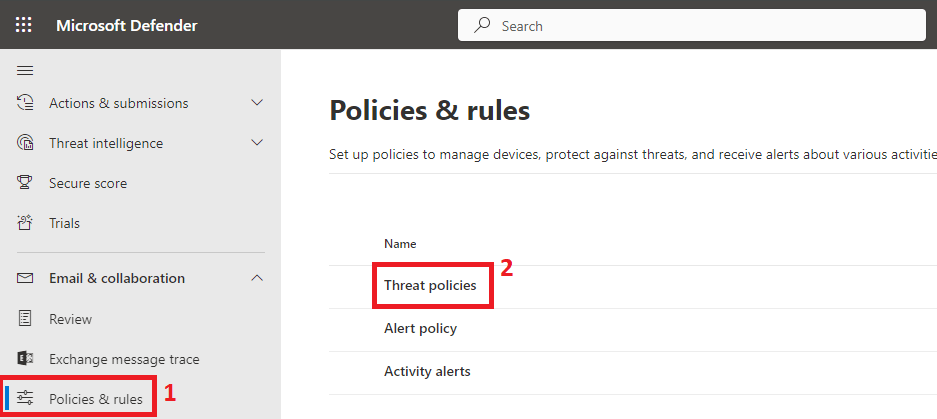
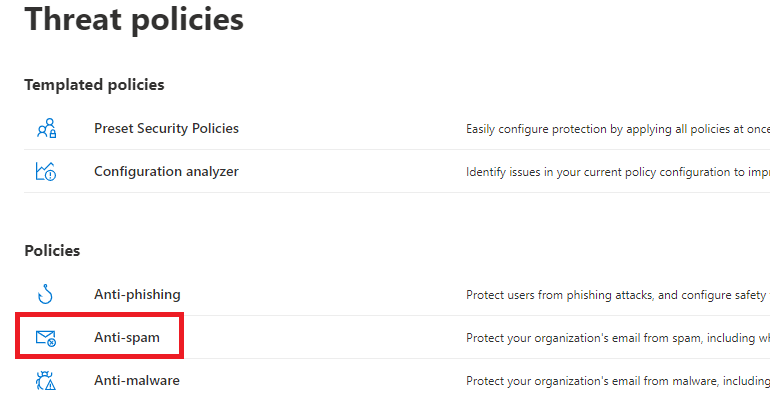
The 3rd way to whitelist a domain in Office 365 is Anti-spam policies. Go to Microsoft Defender for Office 365, under Email & collaboration click Policies & rules, and click Threat policies.
Under Threat policies click Anti-spam.
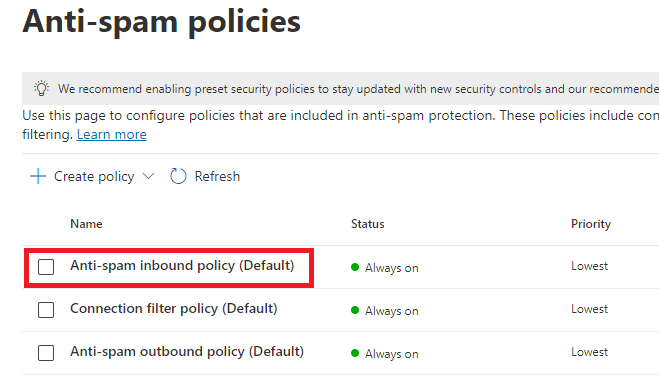
On the Anti-spam policies page, click Anti-spam inbound policy (Default).
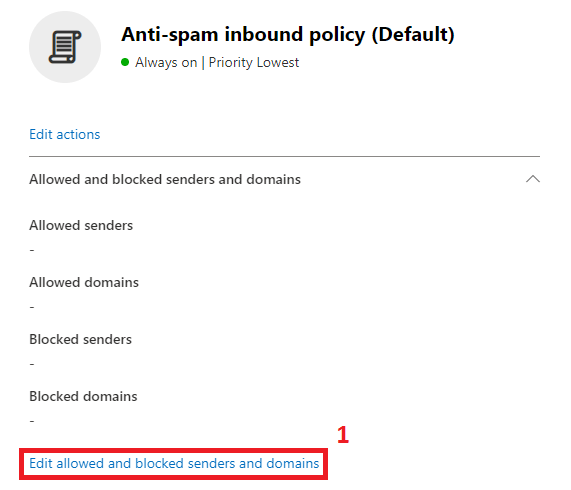
On the Anti-spam inbound policy (Default) properties page, scroll down to the bottom and click Edit allowed and blocked senders and domains as shown below:
On the next screen click Allow domains, click Add domains and add the domains you want to allow in Anti-spam filtering policies and click Done.

Conclusion
In this article you learnt how to whitelist a domain in Office 365 using mail flow rules, Microsoft Defender for Office 365 Submissions, and using Anti-spam policies.
Found this article helpful? You might like our other article on Bypass ATP Scanning in Office 365.
Please join us on our YouTube channel for the latest videos on the Cloud technology and join our Newsletter for the early access of the articles and updates.
Happy Learning!!