
Prepare tenant for device enrollment – Microsoft Intune
In this video you will learn how to set up and prepare our tenant for device enrollment with Microsoft Intune. We will see how to configure terms and conditions, we will see how to configure device categories, how to configure device limits, and device platform restrictions.
Table of Contents
Why we should prepare tenant for device enrollment
The purpose of customizing your tenant or Intune Portal is, when your users will enroll their devices they will see the organization details. They will be confident that they are enrolling their devices to the correct organization. As an Administrator you can add helpdesk contact number, or email addresses for technical support so that the users can contact them if they come across any issues while enrolling their devices to your Tenant.
How to prepare Intune portal for device enrollment
Before we start, I assume you already have Microsoft 365 Tenant and Microsoft Intune supported subscription.
To customize Microsoft Intune Portal, you will go to Microsoft Endpoint Manager, go to Tenant Administration and then click Customization.
As you can see in the below image, you will see default customization that is applied to all the users and all devices in your Tenant. To modify it, you will click Edit.
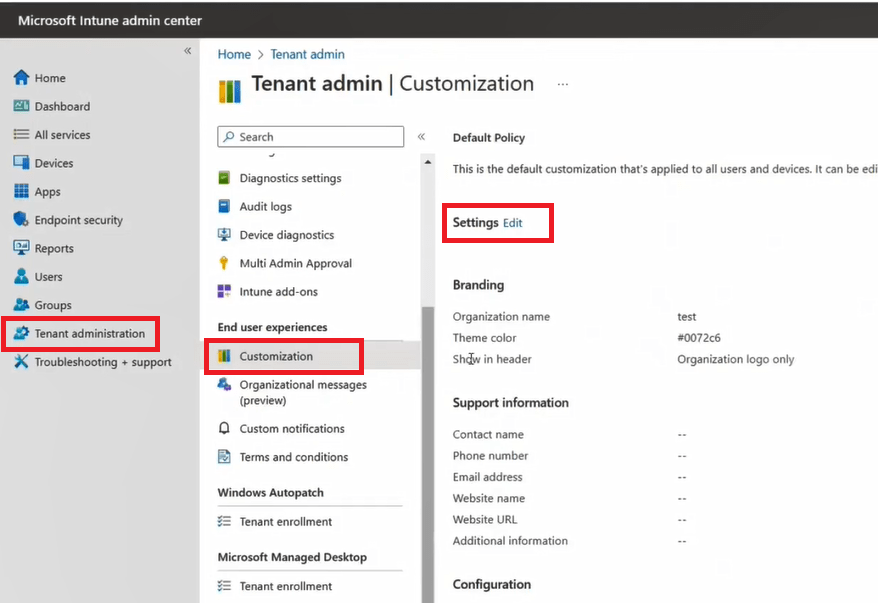
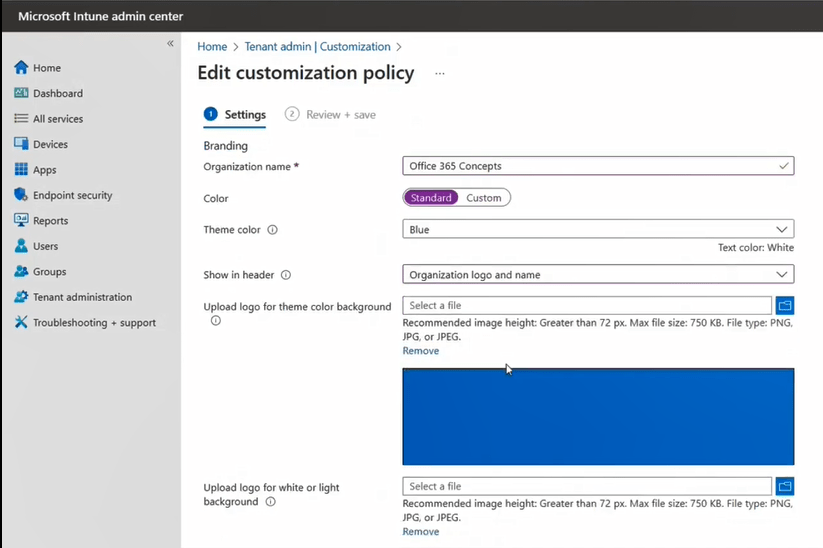
When you Edit the default customization policy, you can configure below information:
| Field Name | More Information |
| Organization name | This name is displayed throughout the messaging in the end-user experience. It can be set to display in headers as well using the Show in header setting. Max length is 40 characters. |
| Color | Choose Standard to choose from five standard colors. Choose Custom to select a specific color based on a hex code value. |
| Theme color | Set theme color to show across end-user experience. We’ll automatically set the text color to black or white so that it’s most visible on top of your selected theme color. |
| Show in header | Select whether the header in the end-user experiences should display the Organization logo and name, the Organization logo only, or the Organization name only. The preview boxes below will only show the logos, not the name. |
| Upload logo for theme color background | Upload the logo you want to show on top of your selected theme color. For the best appearance, upload a logo with a transparent background. You can see how this will look in the preview box below the setting. Recommended image height: Greater than 72 px Maximum file size: 750KB File type: PNG, JPG, or JPEG |
| Upload logo for white or light background | Upload the logo you want to show on top of white or light-colored backgrounds. For the best appearance, upload a logo with a transparent background. You can see how this will look on a white background in the preview box below the setting. Recommended image height: Greater than 72 px Maximum file size: 750KB File type: PNG, JPG, or JPEG |
| Upload brand image | Upload an image that reflects your organization’s brand. Recommended image width: Greater than 1125 px Maximum image size: 1.3 MB File type: PNG, JPG, or JPEG It is displayed in these locations: iOS/iPadOS Company Portal: Background image on the user’s profile page. Windows Company Portal: Background image on the user’s profile page. Company Portal website: Background image on the user’s profile page. Android Intune app: In the drawer and as a background image on the user’s profile page. |
Fill all the fields as per your business requirement, and click Review + Save.
Configure Terms and conditions
You can configure Terms and Conditions as per your business requirement. Like, how users need to enroll their devices, what things they need to consider while accessing company resources, or what to do when their devices are stolen or lost. A terms and conditions policy requires targeted users to accept your terms in Company Portal before they can enroll devices or access protected resources.
Create terms and conditions
To create terms and conditions, go to Microsoft Intune Admin Center, click Tenant administration and click Terms and conditions.
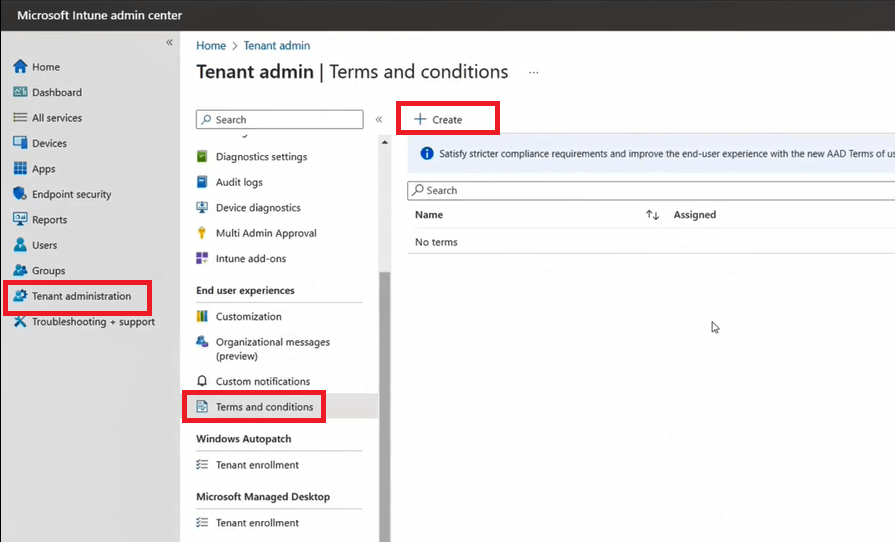
Complete these steps to create an Intune terms and conditions policy.
Select Create.
On the Basics page, enter the following information:
Name: Give your policy a name so that you can recognize it in Intune later. Device users don’t see this name.
Description: Optionally, describe the purpose or intended use for this specific set of terms.
Select Next.
On the Terms page, enter the following information:
Title: The display name for your terms. Users see the title in the Company Portal app.
Terms and conditions: The terms and conditions that users see and must either accept or reject.
Summary of Terms: Enter a brief, high-level explanation of what the user is agreeing to. This text is visible to device users.
Example message: By enrolling your device, you’re agreeing to the terms of use set out by Contoso. Read the terms carefully before proceeding.
Select Next.
On the Select scope tags, select a scope tag from the list to add it to the terms and conditions, or select the default scope tag. Then select Next.
On the Assignments page, choose who you want to assign the terms to. Your options:
Add all users: Choose this option to assign these terms and conditions to all device users.
Add groups: Choose this option to assign these terms and conditions to users in select groups.
Select Next.
Review the summary of your new terms and conditions, and then select Create.
Related articles:
We invite you to browse our other articles on Microsoft Intune:
Demystifying Microsoft Intune: The Ultimate Guide
Decoding MDM vs MAM: A Closer Look at Mobile Management Approaches